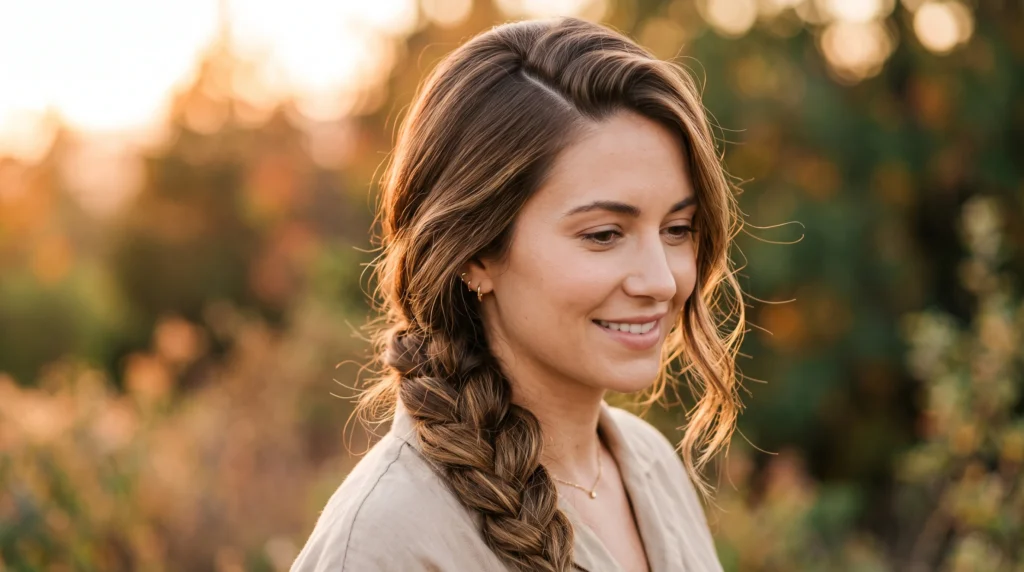
A single braid swept to one side can turn plain hair into something that looks finished in minutes. That’s the appeal behind one-side braid hairstyles: they work on long hair, short hair, thick hair, and fine hair, with only small changes in technique. A French braid feels classic, a fishtail feels undone and cool, and a rope braid feels quick and casual. Add a ribbon, a few pins, or a small flower, and the same base braid shifts from an everyday look to something that suits a wedding or a night out. This list walks through braid types, finishing touches, and length-specific tricks so you can find a version that fits your hair and your morning routine. Every idea here uses tools you likely already own, like bobby pins, small elastics, and a bit of texturizing spray. Whether you want something romantic, edgy, or simply polished for work, there’s a one-side braid style here that delivers a stylish finish without much effort.
1. French Side Braid Basics
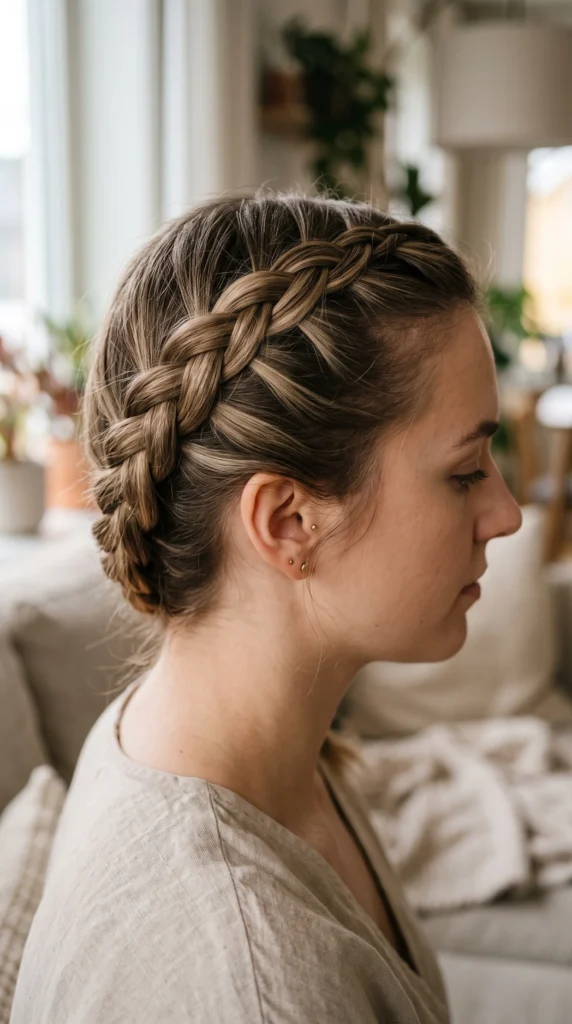
The French side braid is the starting point for most one-side looks. Part your hair deeply on one side, then start braiding at the temple, picking up small sections of hair as you go. Keep the braid close to your scalp so it hugs your head neatly. Bring it down and over your shoulder, then secure the end with a small clear elastic. This style works on hair past the collarbone, though shoulder-length hair can manage a shorter version too. A few dollars’ worth of elastics is all you need. If your braid feels too tight, gently loosen a few sections with your fingers for a softer, more relaxed shape. This look holds through a full day, whether you’re at school, work, or running errands. Practice the picking-up motion a few times if you’re new to French braiding. Once you get the rhythm, this becomes a fast, reliable go-to style.
2. Dutch Side Braid Reverse
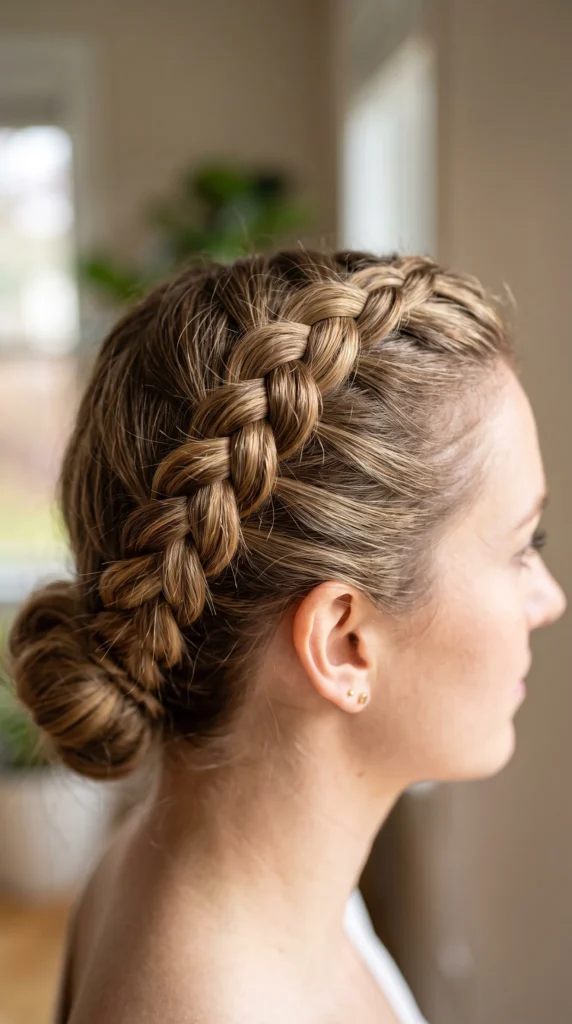
A Dutch braid is a French braid in reverse. Instead of crossing strands over the top, you cross them underneath. This makes the braid sit above the surface of your hair instead of blending in, so it looks bolder and more dimensional. Start at your temple, cross sections under each other, and work your way down toward one shoulder. This style shows up nicely on straight or wavy hair since the raised pattern catches the light. A small amount of gel on your palms helps control flyaways as you work. This braid pairs well with a plain outfit since the texture becomes the main detail. If your hair is thick, this style holds especially well because there’s more grip for each cross. Secure the end with a small elastic, then gently pull the edges of each loop outward for extra fullness once you’re done.
3. Fishtail Side Braid
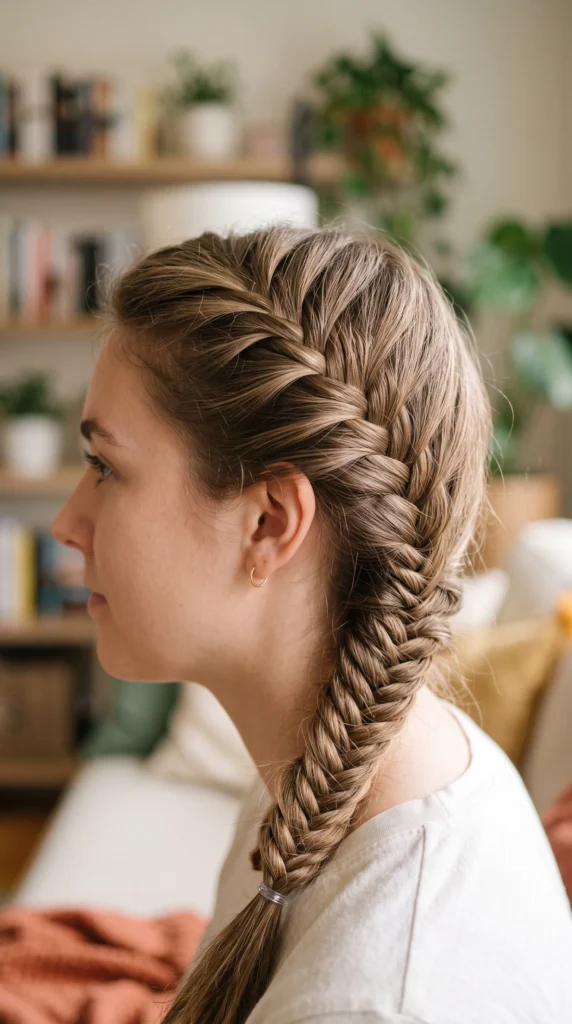
Fishtail braids look complex but only use two sections of hair instead of three. Gather your hair to one side, split it into two halves, then take a thin piece from the outer edge of one half and cross it over to the other. Repeat this on alternating sides, working your way down. The result is a textured, woven pattern that looks undone in a good way. This style suits hair that’s a little dirty or has natural texture already, since fishtails hold better with some grip. A texturizing spray, which costs around ten dollars, adds extra grip if your hair is freshly washed and slippery. Secure the end with a clear elastic. Gently pull the edges apart once finished for a fuller, more relaxed look. This braid works for casual days and dressier occasions alike, since the detailed pattern reads as effortless rather than plain.
4. Rope Side Braid
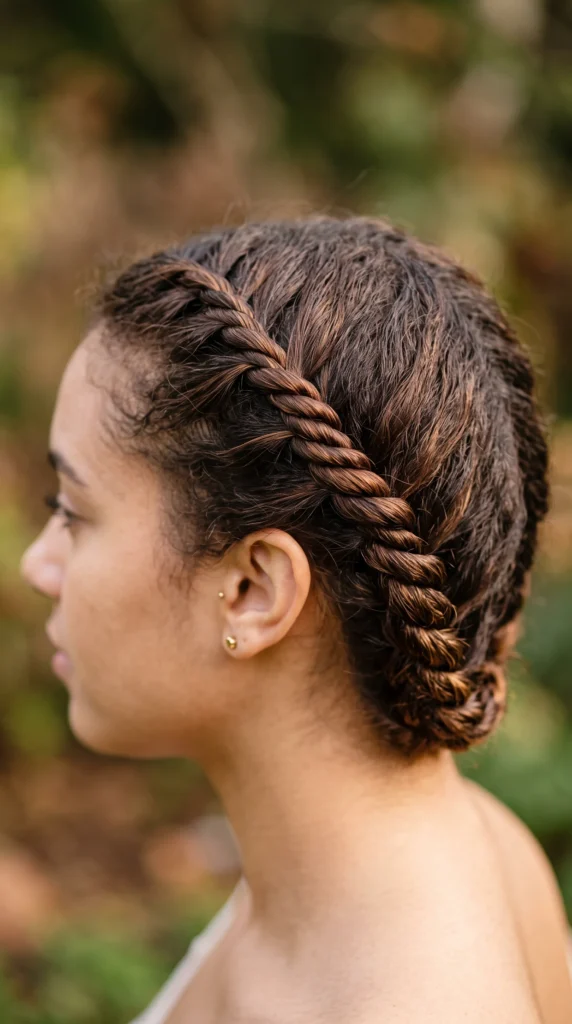
A rope braid is the fastest braid on this list. Gather your hair to one side, split it into two sections, then twist each section in the same direction before twisting the two together. The twisting motion creates a spiral pattern that looks like a thick rope. This is a good starting point if regular three-strand braiding feels tricky, since it only takes two sections and a twisting motion. Secure the end with a small elastic once you reach the bottom. This style works well on medium to long hair and holds up nicely through a full day. It also looks neat with minimal practice, which makes it a solid choice for mornings when you want something more than a plain ponytail but don’t have much time. Pair it with a deep side part for extra polish, or leave a few loose pieces near your face for softness.
5. Side Braid Crown
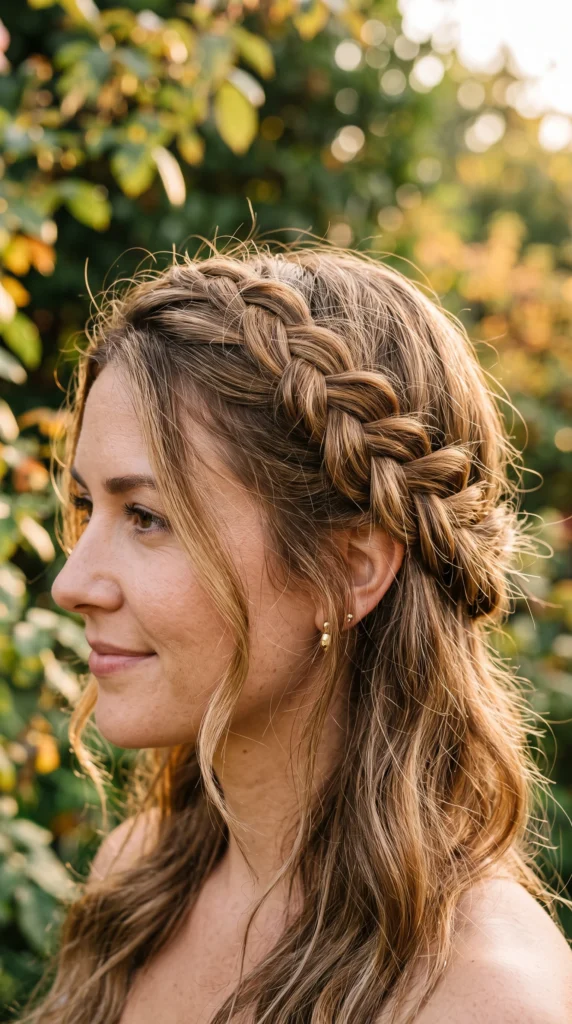
A braid crown adds a romantic touch without requiring a full updo. Start a French or Dutch braid at one temple and continue it along your hairline, angling it toward the back of your head instead of down your shoulder. Pin the end securely once you run out of hair to braid. This creates a halo-like line that frames your face. It works well for dressier occasions, though a simpler version suits everyday wear too. A handful of bobby pins, usually just a few dollars for a pack, is all you need to secure the end and any loose sections. Leave the rest of your hair down for a soft, flowing finish. This style pairs beautifully with loose waves underneath. If your hair is shorter, keep the braid closer to your hairline rather than trying to wrap it fully around, since shorter hair has less length to work with.
6. Waterfall Side Braid
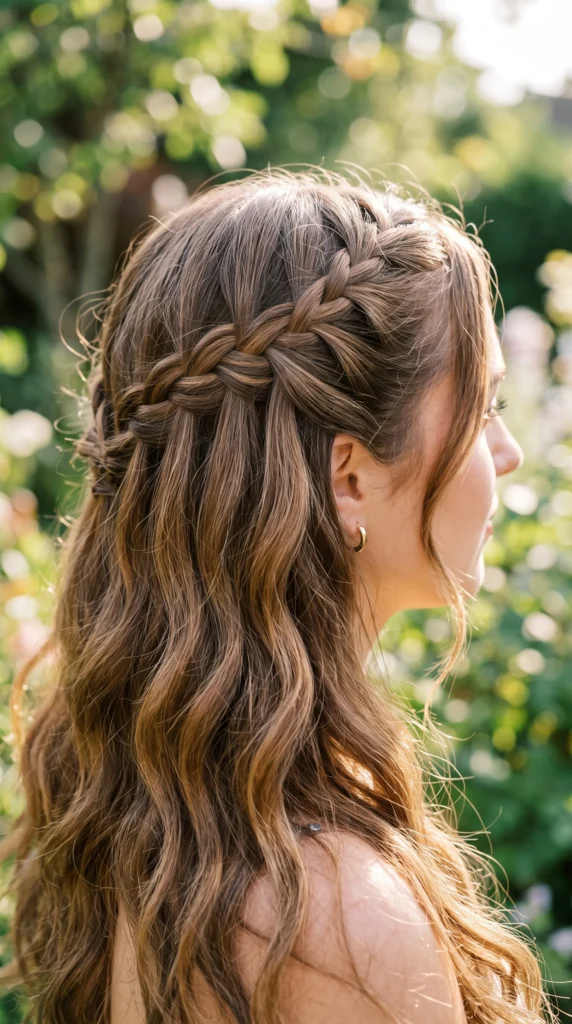
The waterfall braid is a decorative variation where you drop one section of hair out of the braid at each cross instead of keeping all the strands in. This creates a cascading effect, where pieces of hair fall loose below the braid line while the rest continues braiding across your head. Start at one temple and work horizontally, dropping a section each time you would normally add one in. This style looks elegant with minimal effort once you understand the pattern. It suits long, layered hair best, since the dropped pieces need enough length to blend with the rest of your hair. Curl the loose sections lightly with a wand for extra shape, or leave them natural for a softer look. This braid pairs well with special occasions, though a simpler, shorter version also works for a regular day out.
7. Braided Side Bun
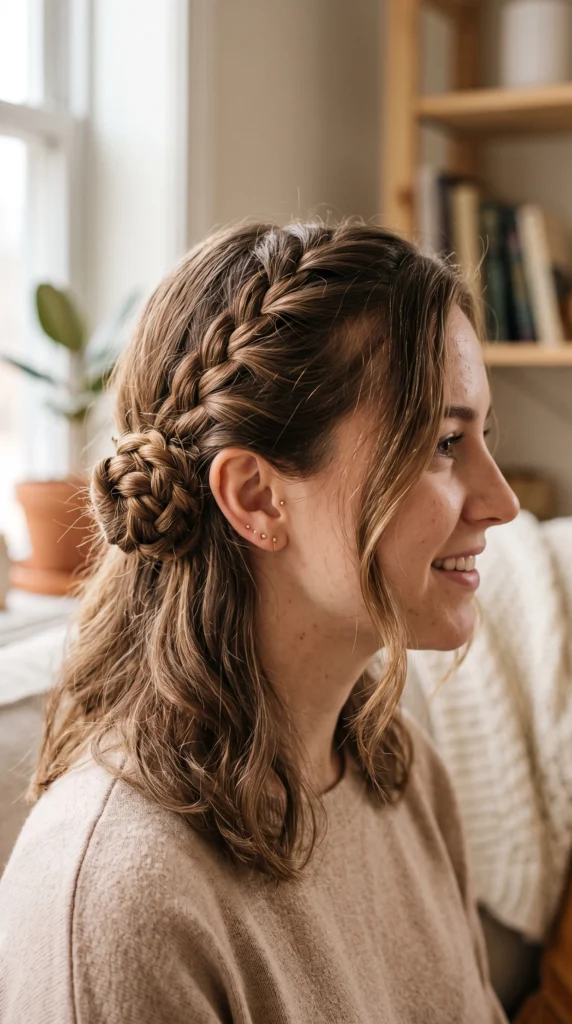
Combining a braid with a bun creates a style that feels more finished than either one alone. Braid a section of hair from one side down toward your ear, then twist the remaining length into a small bun and pin it in place near your ear or the nape of your neck. This works well for both casual days and slightly dressier settings. A few bobby pins hold the bun securely, and a small elastic keeps the braid from unraveling before you twist it. This style suits medium to long hair, though a mini version works on shorter lengths too. Leave a few loose pieces around your face for a softer finish. This look holds up well through movement, making it a practical option for busy days when you still want something that looks intentional rather than thrown together.
8. Side Braid into Low Ponytail
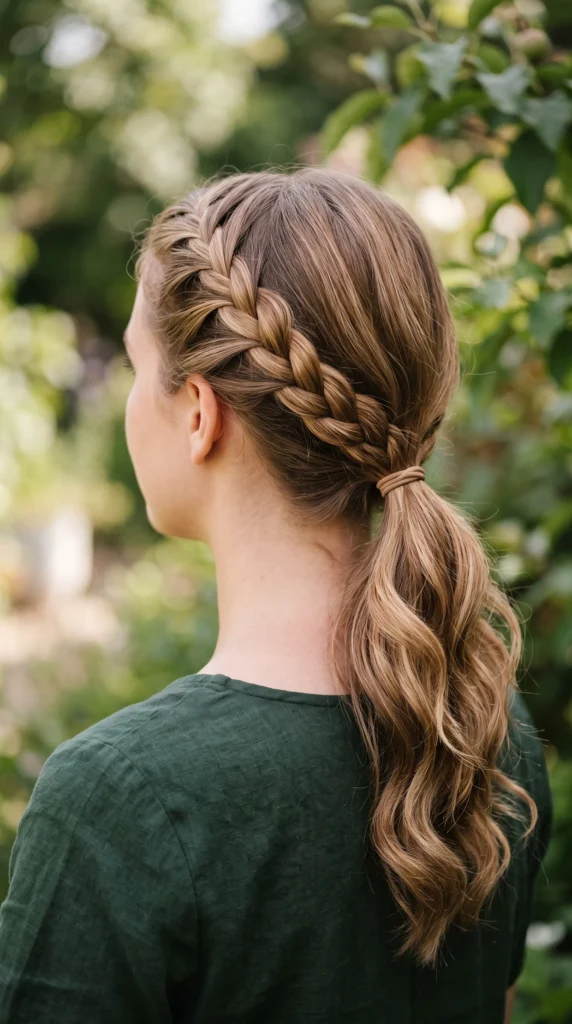
This style starts as a braid near your temple and transitions into a low ponytail once you run out of hair to braid on that side. Start braiding at one temple, working diagonally toward the back of your head, then gather the remaining hair into a low ponytail at the nape of your neck. Secure with an elastic. This creates a style that looks styled from the front but stays simple in the back. It works well on hair past the shoulders. A light smoothing serum, applied to your palms before you begin, helps keep flyaways controlled. This look suits both casual and slightly formal settings, since the braid adds detail without requiring a full updo. Wrap a small section of hair around the elastic to hide it for a cleaner finish.
9. Hidden Side Braid Tucked Behind Ear
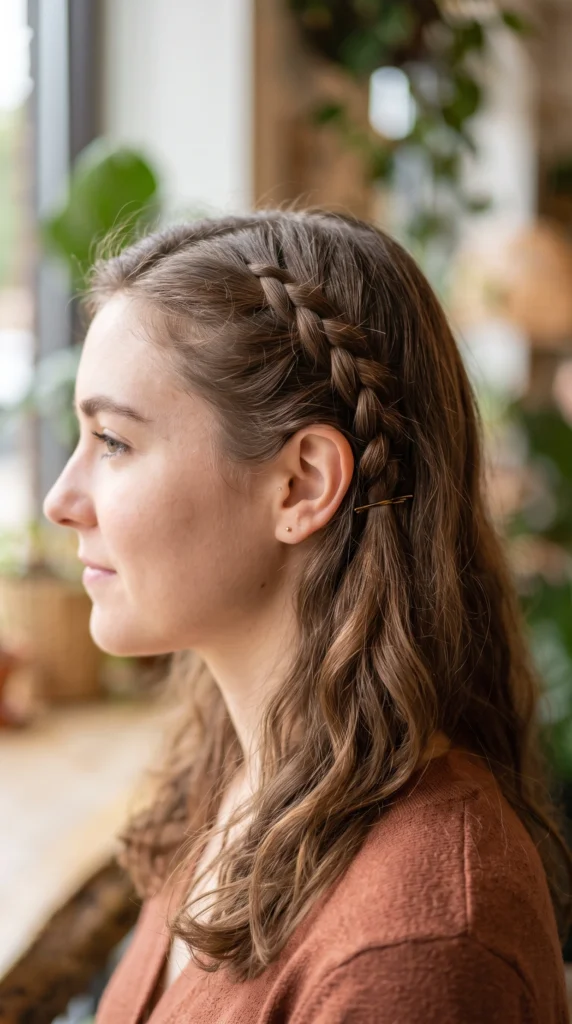
This is a subtle way to add braid detail without committing to a full braided look. Take a small section of hair near your temple, braid it down about two or three inches, then tuck it behind your ear along with the rest of your hair. The braid peeks out only slightly, creating a small surprise detail rather than a dominant style feature. This works on any hair length, since only a small section gets braided. Secure the end with a tiny clear elastic before tucking. This look pairs well with straight or wavy hair worn down, and it takes only a minute or two to complete. It’s a good option for days when you want a small styling detail without spending much time, and it works for both casual outings and slightly dressier settings.
10. Bubble Side Braid
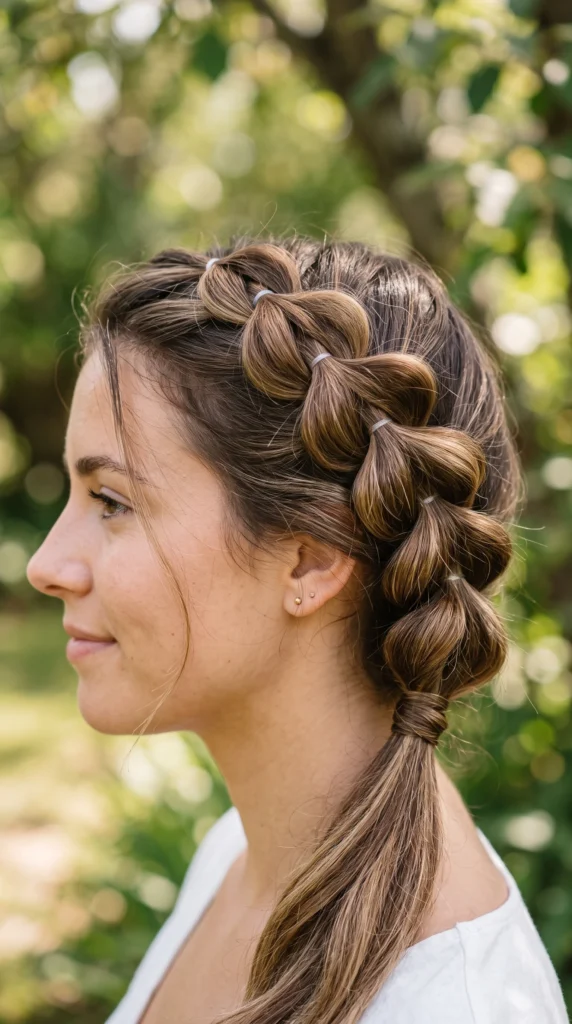
A bubble braid isn’t a true braid at all, but it looks like one from a distance. Gather your hair into a low side ponytail, then add small elastics every inch or two down the length. After each elastic, gently pull the hair between the bands outward to create a rounded, bubble-like shape. This creates dimension and texture without any actual braiding technique. A pack of small elastics costs only a few dollars and works for this style repeatedly. This look suits hair with some length, since you need enough to create multiple bubble sections. It photographs well thanks to the rounded shapes and works for both casual and dressier days. If your hair is fine, tease the roots slightly before starting for extra volume. This is a good beginner option if traditional braiding feels difficult, since it only requires elastics and pulling.
11. Lace Braid Along Hairline
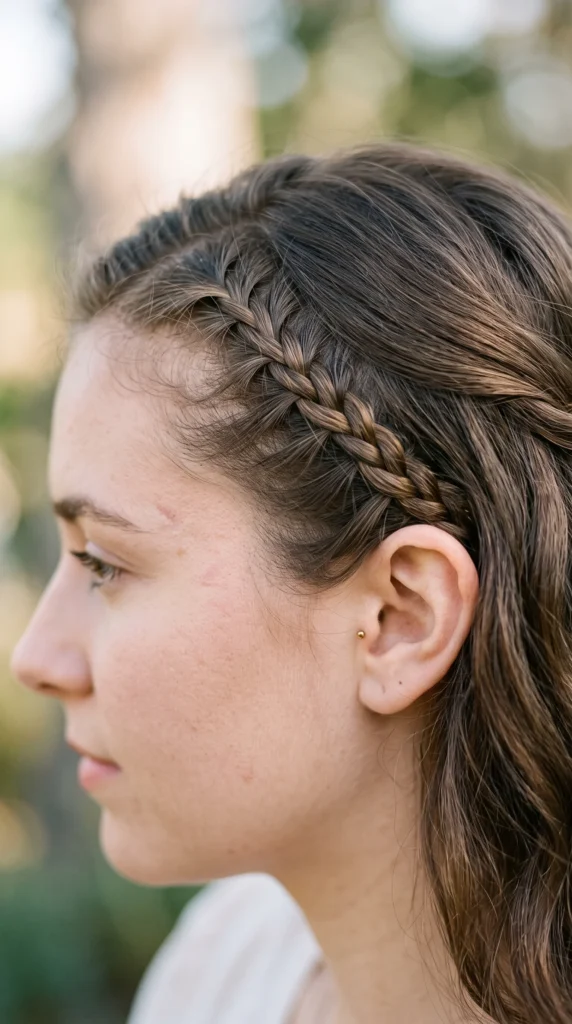
A lace braid is a thinner, more delicate version of a French braid that follows your hairline closely. Start at your temple and pick up very small sections of hair as you braid along your part or hairline, keeping the braid thin throughout. This creates a delicate, lace-like pattern instead of a thick, dominant braid. It works well combined with the rest of your hair worn down or in loose waves. This style takes a bit more patience since the sections are small, but the result looks detailed and polished. A fine-tooth comb helps you section hair precisely as you go. This look suits both everyday wear and special occasions, since the thin braid adds a decorative line without overwhelming the rest of your hairstyle. Secure the end with a small clear elastic once you run out of hairline to follow.
12. Baby Braids Accent
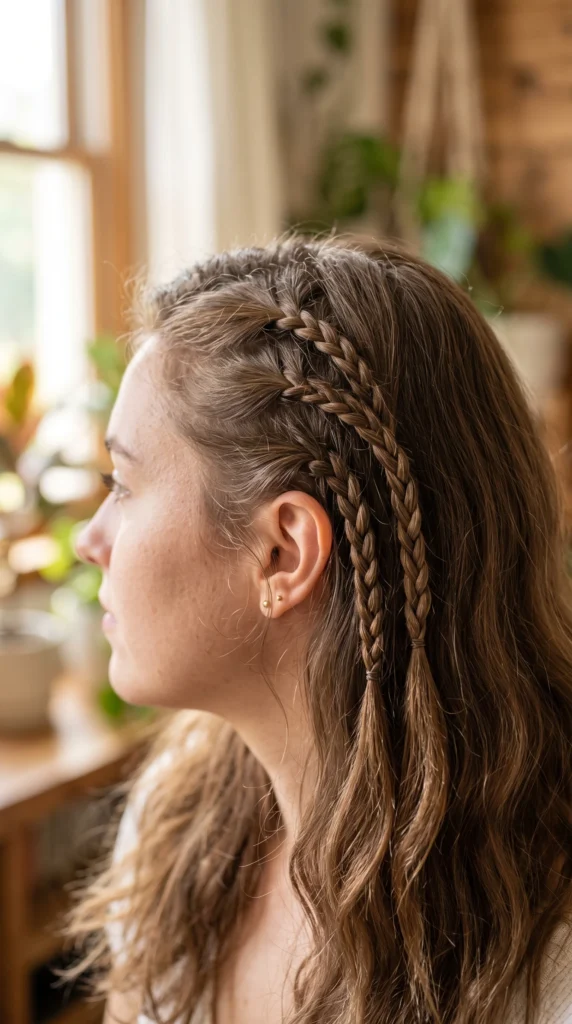
Baby braids are small, thin braids scattered through otherwise loose hair. Section off two or three small pieces near one side of your part, braid each one down a few inches, and secure with tiny clear elastics. Leave the rest of your hair down and natural. This adds texture and a boho feel without requiring a full braided style. It works on any hair length, since each braid only uses a small section. A pack of tiny elastics is inexpensive and reusable for many looks. Try spacing the braids unevenly for a more natural, undone feel rather than a perfectly symmetrical pattern. This style pairs well with beachy waves or straight hair alike. It’s a good option for casual outings, festivals, or any day when you want a small decorative detail without much planning or time.
13. Braid Headband for Short Hair
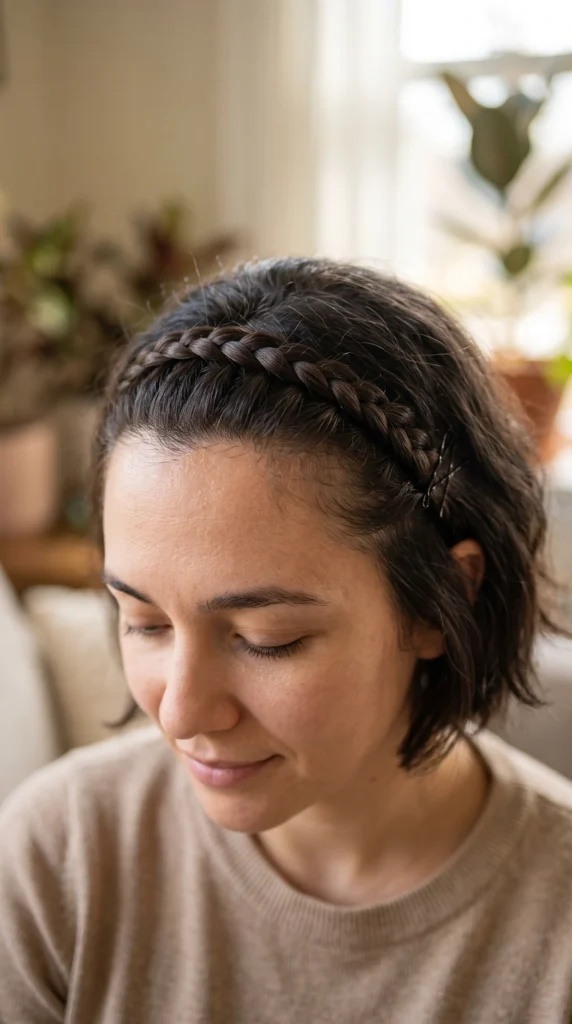
Short hair can still join in on the one-side braid trend with a braid headband. Take a section of hair from one side of your part, braid it across your hairline toward the other side, and pin the end behind your ear. This creates a headband-like line using your own hair. It works especially well on bobs and lobs, since the braid doesn’t require much length to look intentional. This style keeps hair off your face and holds well through movement. A couple of bobby pins secure the end once you reach the other side. Leave the rest of your hair down or in a low ponytail underneath. This look feels practical and stylish at the same time, and it proves that shorter hair lengths can still take part in braid trends without needing extensions or extra length.
14. Pancaked Side Braid for Volume
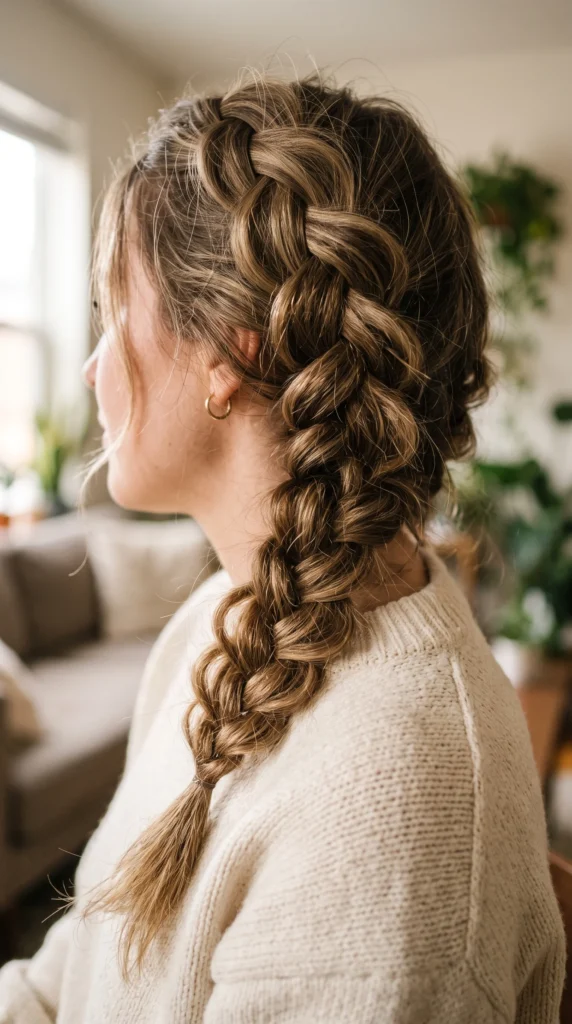
Pancaking is a technique that turns a thin braid into a fuller, wider one. After finishing a French or Dutch side braid, gently pull the outer edges of each loop outward with your fingers, working from top to bottom. This widens the braid and adds volume, which helps if your hair is fine or thin. Go slowly, since pulling too hard can loosen the braid completely. A light hold hairspray after pancaking helps keep the wider shape in place through the day. This technique works on any braid type, though it shows up most clearly on French and Dutch styles. It’s a useful trick for anyone whose braids tend to look flat or thin. This is a free technique that only requires your hands, making it one of the most budget-friendly upgrades on this list.
15. Deep Side Part Braid
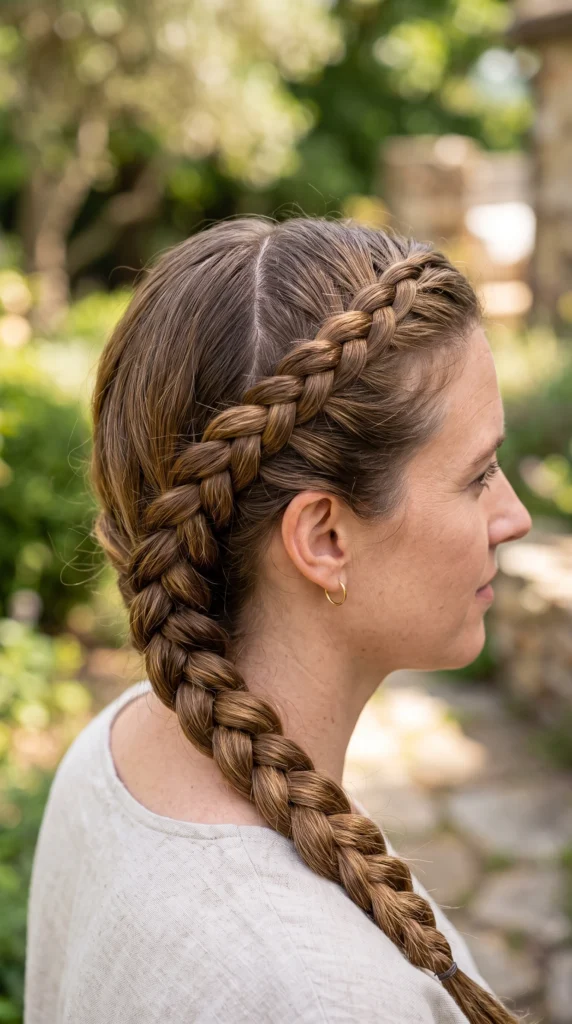
The part itself can be part of the style. Instead of a center or slight side part, push your part deeply to one side, close to your ear. This immediately creates more volume on one side and sets up a natural starting point for any side braid. Begin braiding right where the part meets your hairline for a seamless look. A rat-tail comb, which costs only a couple of dollars, helps create a clean, straight part line. This small adjustment changes the entire feel of a braid, making it look more deliberate and polished. It works with any braid type on this list, from a simple rope braid to a detailed fishtail. Try experimenting with how deep the part sits to see what suits your face shape best before settling on your usual placement.
16. Flower-Accented Braid Crown
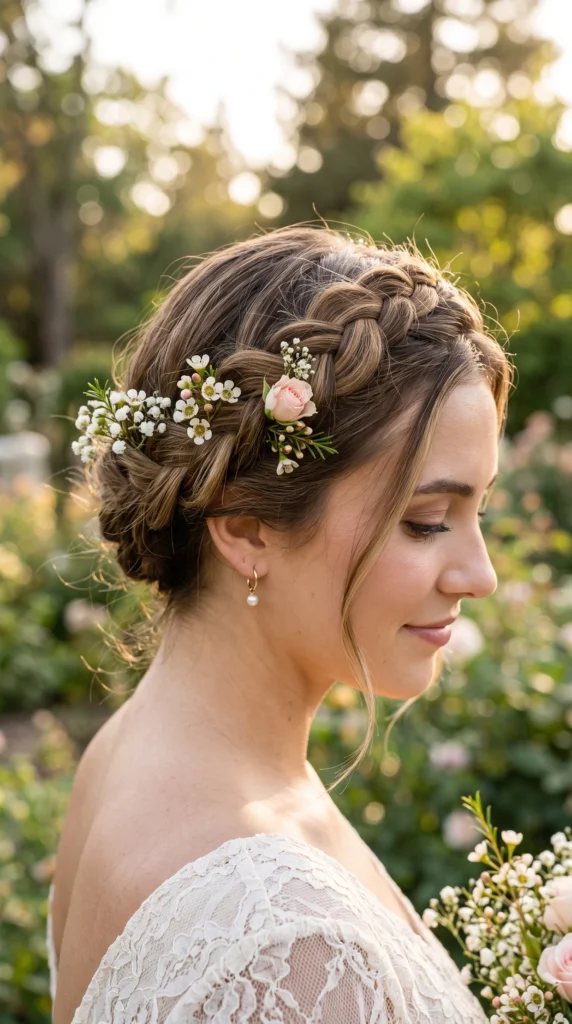
Small flowers tucked into a braid crown add a romantic touch for special days. Once your braid crown is pinned in place, tuck one or two small flowers into the strands near your temple or along the braid line. Fresh flowers work well for a single event, while small fabric flowers can be reused many times. Craft stores sell fabric flower picks for just a few dollars, and you can trim the stems to fit your hair easily. This detail works especially well for spring or summer occasions, garden parties, or casual weddings. Keep the flower placement simple, using just one or two rather than covering the whole braid, so the look stays soft rather than overwhelming. This is a low-cost way to dress up a braid you already know how to do, without needing a whole new hairstyle.
17. Ribbon-Wrapped Side Braid
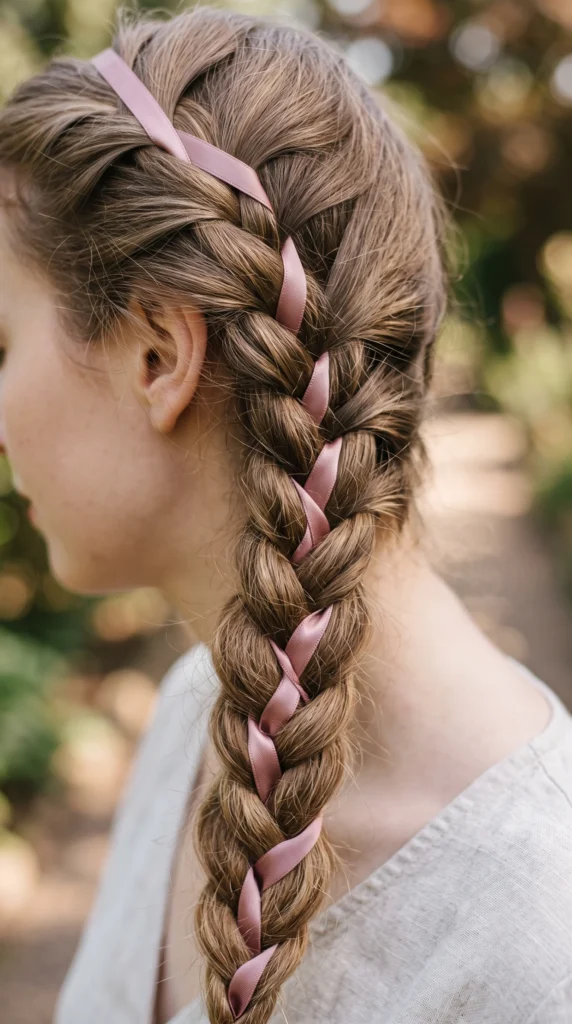
Weaving a thin ribbon through your braid adds color and detail without much extra effort. Tie one end of a ribbon to the base of your braid before you start, then treat it as an extra strand as you braid down. The ribbon will show up in small peeks throughout the braid. Tie off the ribbon along with your hair at the end using a small elastic, then finish with a bow if you like. Ribbon by the yard costs very little at most craft stores, and one spool can be used for many looks. This style works well for celebrations, school events, or any day you want a bit of color. Choose a ribbon that matches your outfit for a coordinated look, or pick a contrasting color for something bolder. This is an easy way to make a familiar braid feel new again.
18. Decorative Pin Finish
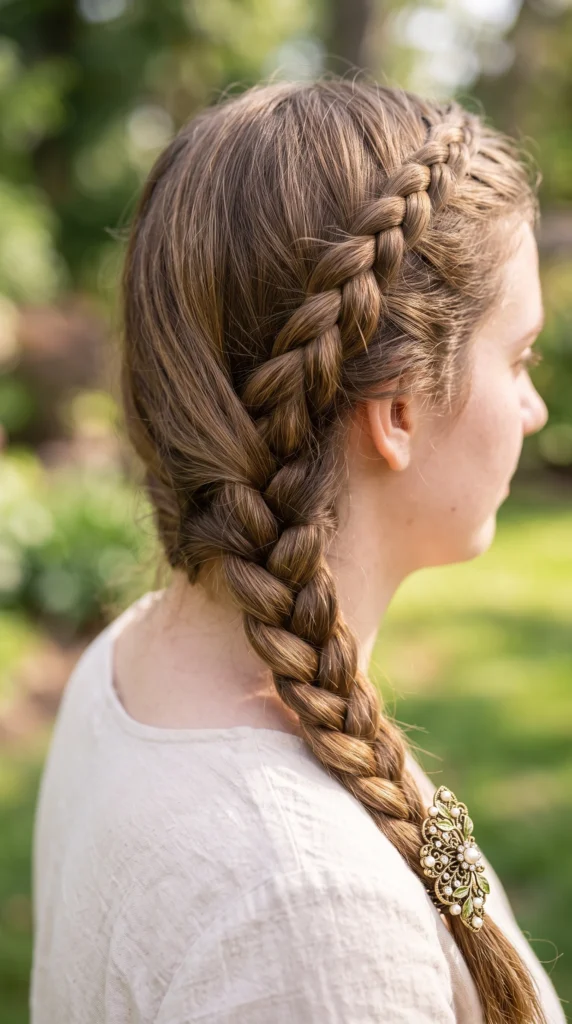
A single decorative pin at the base of your braid can change the whole look. Once your braid is secured with an elastic, place a pearl pin, a small metal bar pin, or a jeweled clip right where the braid meets your hairline. This hides the elastic and adds a small finishing detail. Decorative pins are inexpensive and available in most beauty aisles, often just a few dollars each. This works well on any braid style, from a simple rope braid to a detailed fishtail. Try matching the pin’s finish to your jewelry for a coordinated look, or pick something bold for contrast. This small addition takes only a few seconds but makes the braid feel more finished, which is useful for days when you want your hairstyle to look a bit more polished without extra styling time.
19. Side Shave Undercut Braid
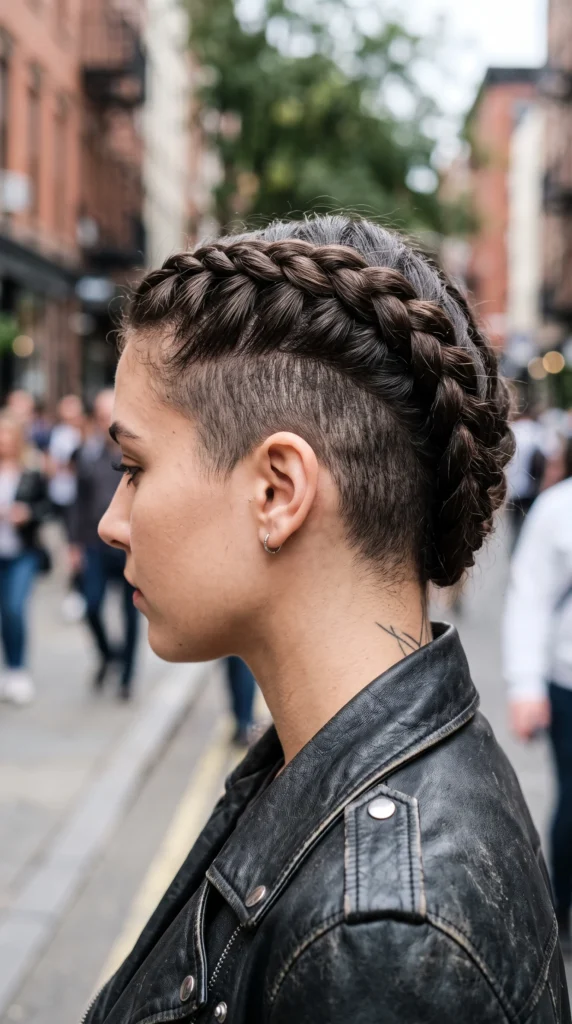
For a bolder look, a side braid paired with a shaved or closely trimmed undercut creates strong contrast. If you already have an undercut, braid the longer section of hair on the opposite side and let it fall over or away from the shaved area. This style works well for anyone who already has this cut and wants a way to style the longer side. No extra products are needed beyond what you’d normally use for a braid. This look reads as edgy and modern, and it photographs well thanks to the visible contrast between smooth and textured sections. If you don’t have an undercut but like the look, this can be a talking point with your stylist for a future cut. For now, sweeping a side braid away from one temple can hint at the same asymmetrical feel.
20. Mohawk-Inspired Side Braid
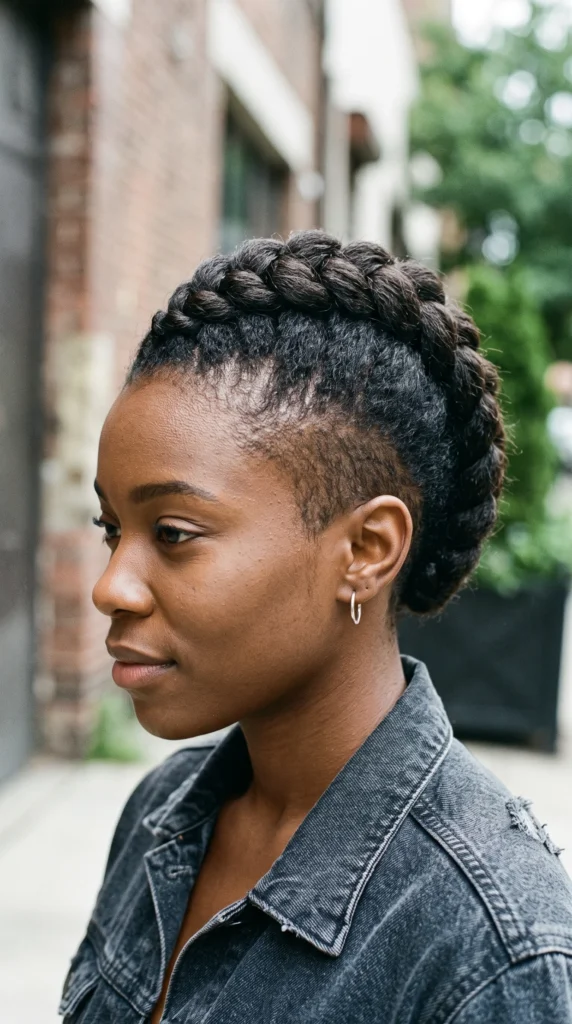
This style borrows the raised, center-line shape of a mohawk but softens it into a braid instead of spikes. Section a strip of hair from your forehead back toward one side, then Dutch braid this section so it sits raised above the rest of your hair. Let the remaining hair fall loose or pull it into a low ponytail. This creates a bold, structured look with an edgy feel. It works best on hair with enough length to braid securely, usually past the chin. A strong-hold gel along the part lines keeps the raised sections neat throughout the day. This style stands out in a crowd and works well for concerts, parties, or any occasion where you want your hair to make a statement rather than blend into the background.
21. Office-Appropriate Sleek Side Braid
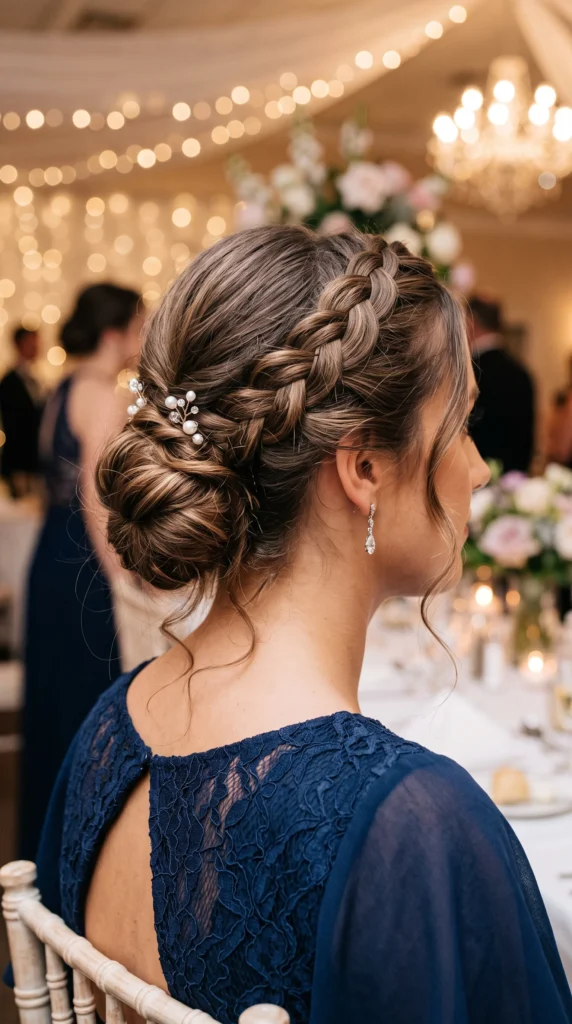
Not every braid needs to look undone. For a polished, workplace-appropriate look, smooth your hair thoroughly before braiding, using a comb to eliminate bumps and flyaways. Braid tightly along one side, keeping each section even and controlled, then secure at the nape of your neck rather than letting it fall over your shoulder. A smoothing serum applied before you start helps create a sleek surface. This style avoids the pancaked, textured look of more casual braids in favor of a clean, tidy finish. It pairs well with simple, structured clothing and looks appropriate for meetings, interviews, or any setting where a more polished appearance matters. This proves that braids aren’t only for casual or romantic occasions. With the right finish, the same basic technique becomes suitable for professional settings too.
22. Wedding Guest Side Braid Updo
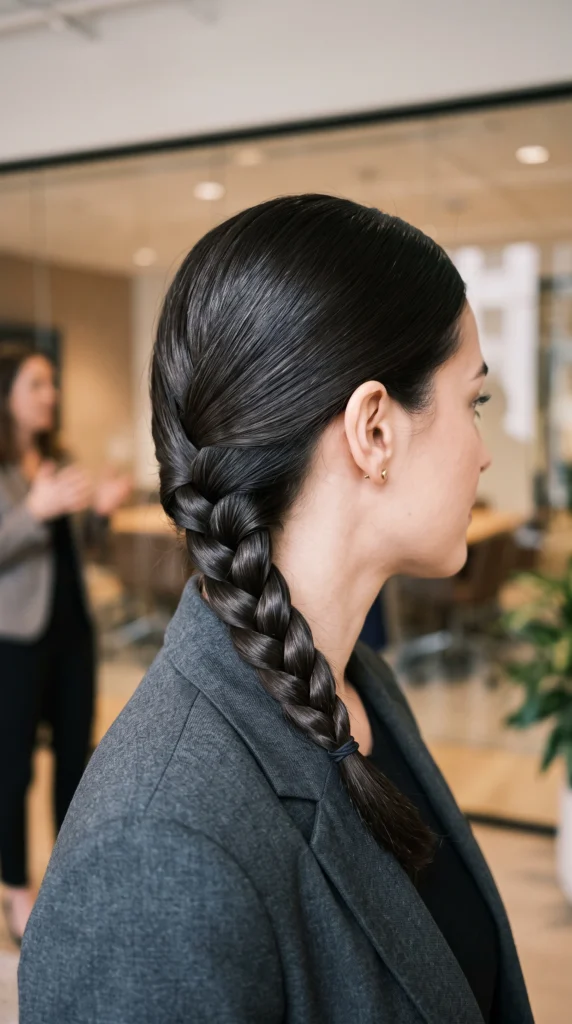
For weddings or formal events, a side braid can be built into a fuller updo. Braid a section from one temple, then loop and pin the remaining hair into a low, gathered bun on the same side, letting the braid wrap partially around the base. This creates a dressier, more structured version of a side braid than an everyday look. Take your time securing each section with bobby pins, since this style needs to hold through hours of movement and dancing. A strong-hold hairspray helps keep everything in place. This look pairs well with loose, curled face-framing pieces for softness. It’s a good option when you want something that feels more special than a simple braid but still keeps your hair away from your face and shoulders for comfort throughout a long event.
23. Beginner Single Side Braid
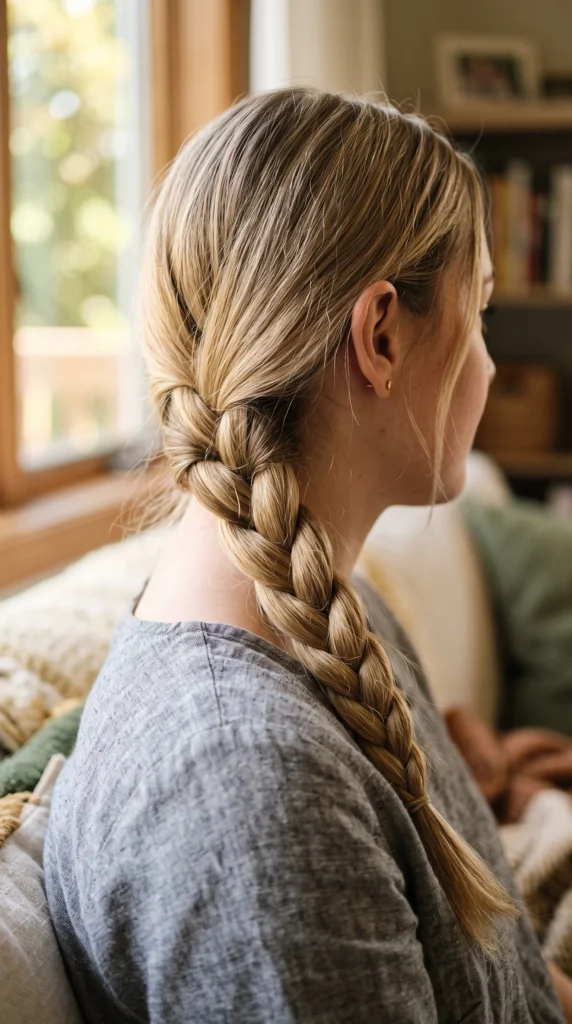
If braiding feels intimidating, start here. Gather all your hair to one side, split it into three even sections, and cross the outer sections over the middle one, alternating sides as you go. This is the most basic braid technique and doesn’t require picking up new hair as you go, which makes it easier to learn. Secure the end with a small elastic once you reach the bottom. This style works on any hair length past the shoulders and takes only a minute or two once you’re comfortable with the motion. Practice in front of a mirror a few times to get used to the crossing pattern. This braid is a solid foundation before trying French, Dutch, or fishtail variations, since the basic hand motion carries over to more detailed styles later on.
24. Fake Braid Illusion Wrap
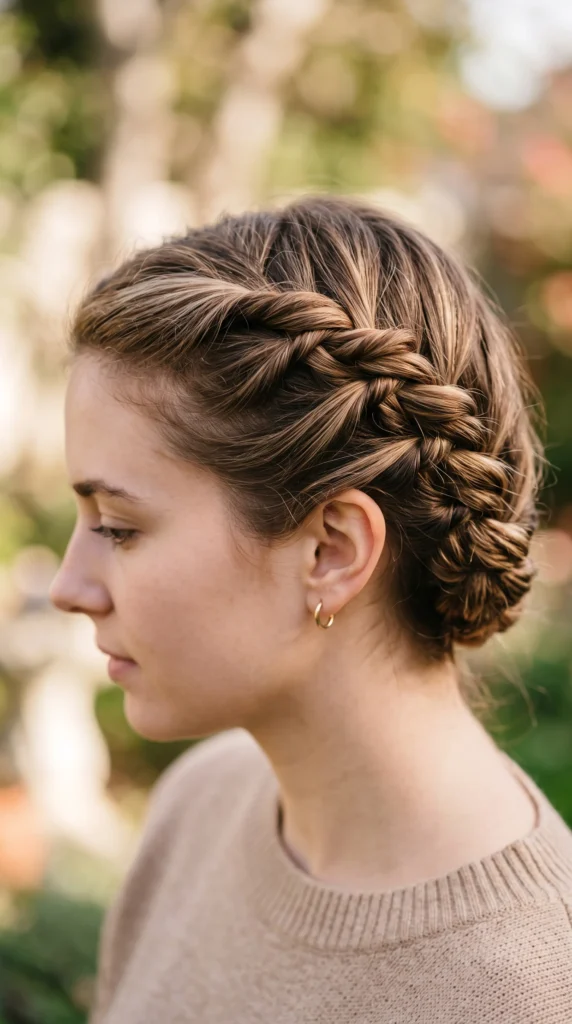
If you’re short on time or still learning to braid, this trick creates the look of a braid without the technique. Take a section of hair, twist it tightly, then wrap it around itself in a spiral before pinning it in place along one side of your head. From a short distance, the twisted, wrapped shape reads as a braid thanks to its texture and direction. This works well for busy mornings or as a backup when a real braid isn’t holding well. A few bobby pins are all you need to secure the wrap. This style suits any hair length, since twisting requires less length than true braiding. It’s a useful trick to keep in your back pocket for days when you want the braided look without spending extra time perfecting the technique.
Conclusion
One-side braids offer a lot of range for very little effort. A simple rope braid takes two minutes, while a flower-accented crown braid can carry you through a formal event. The tools stay the same across nearly every style on this list: a few bobby pins, small elastics, and maybe a spool of ribbon or a light hairspray. Try a handful of these looks over the next few weeks to see which braid types and finishes suit your hair length and your daily routine best. Once you find two or three favorites, a stylish, finished look becomes something you can put together quickly, whether you’re heading to work, a wedding, or just running errands with your hair looking like you put real thought into it.