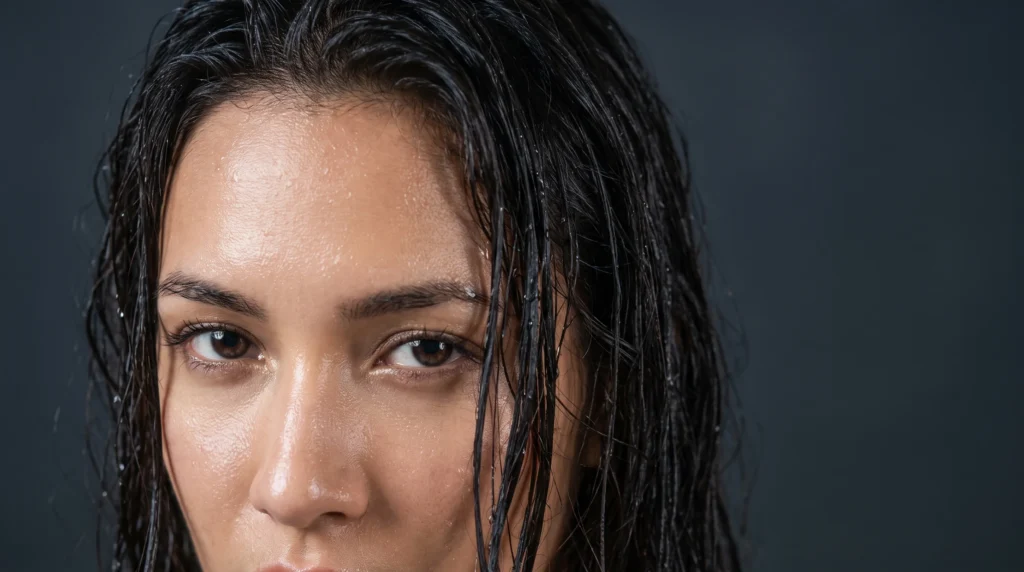
Wet hair is having a real moment, and it’s not hard to see why. It looks polished without hours of styling. It works on every hair length, every texture, and every budget. Whether you want a red-carpet-ready slick back or soft, glossy waves that look like you just stepped out of the ocean, this list has an option for you. Below are 25 wet hair looks you can try at home, along with simple tips so the style holds without turning stiff, crunchy, or greasy. Grab a spray bottle, a bit of gel or oil, and let’s get into it.
1. Classic Slicked-Back Wet Look
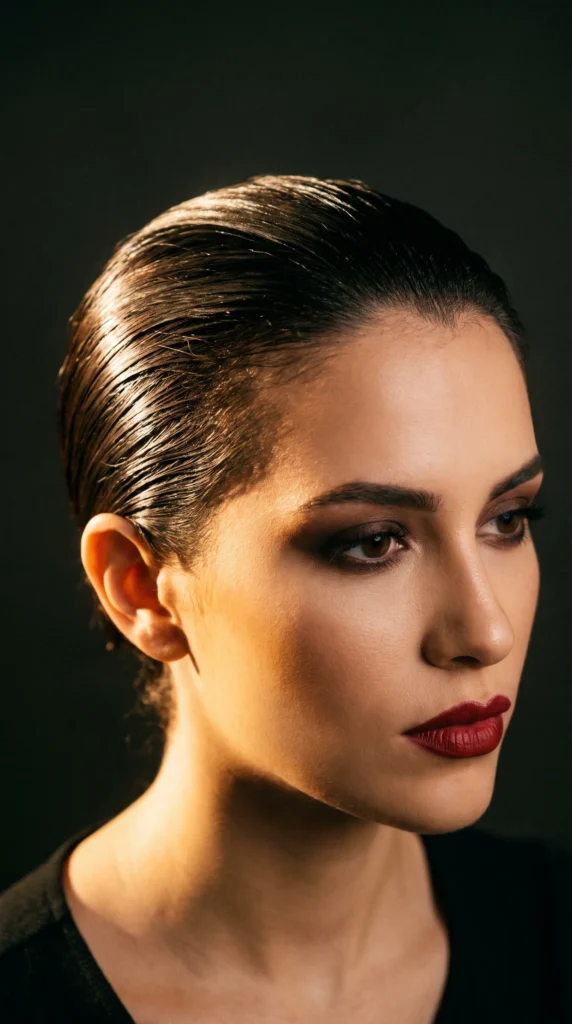
This is the style that started it all. Slicked-back hair looks sharp, clean, and instantly polished. All you need is a comb, a little water, and a small amount of gel. Start at your roots and work the product down to the ends. Use a bristle brush to smooth every strand back. No flyaways allowed. This look works for short hair and long hair alike. It’s a great pick for job interviews, date night, or a quick everyday style when you’re short on time. For a budget version, skip the salon gel and use a drugstore aloe vera gel instead. It gives shine without stiffness. Try not to soak your hair completely. Damp hair holds the slick shape better than soaking wet hair, which can look heavy. Finish with a light spray to lock everything in place. This one style alone can carry you through half your week if you keep a travel-size gel in your bag for touch-ups.
2. Wet Hair Bun for Effortless Glam
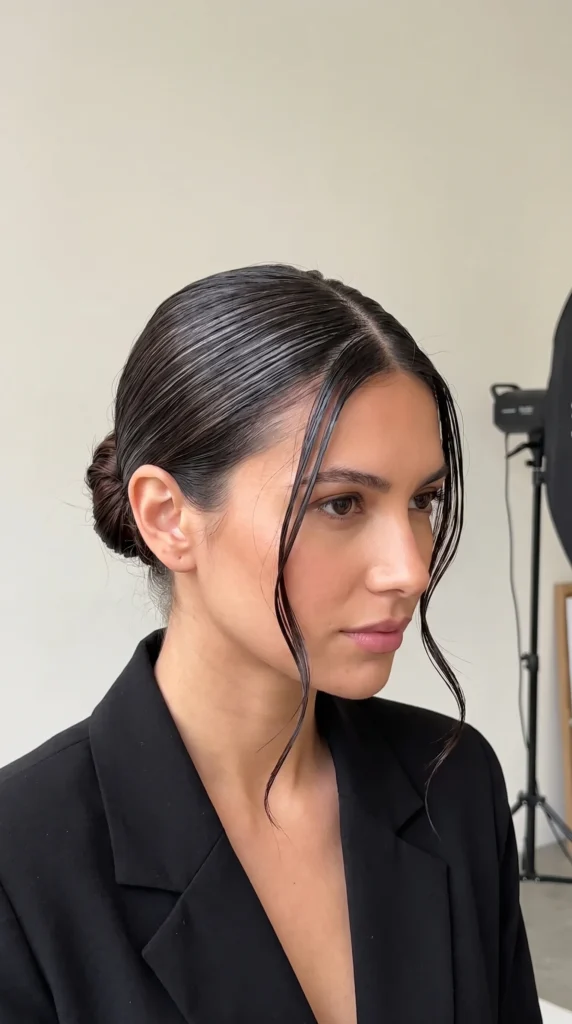
A wet bun takes minutes and looks like you tried much harder than you did. Wet your hair slightly, add a small amount of gel, then pull it into a low or high bun. Use bobby pins to keep it smooth against your scalp. Leave two soft pieces near your face for a face-framing finish. This look pairs well with hoop earrings and bold lipstick. It’s a great pick for the office, a wedding guest look, or a quick fix on a bad hair day. Budget tip: an old toothbrush dipped in gel works well for smoothing tiny flyaways near the hairline. This trick saves you from buying an expensive edge brush. Keep the bun tight but not painful, and avoid pulling too hard at the roots. If your hair is thin, add a bit of texture spray before the bun so it holds shape longer. This style also works well on second-day hair, so you don’t always need a fresh wash to pull it off.
3. Face-Framing Wet Waves
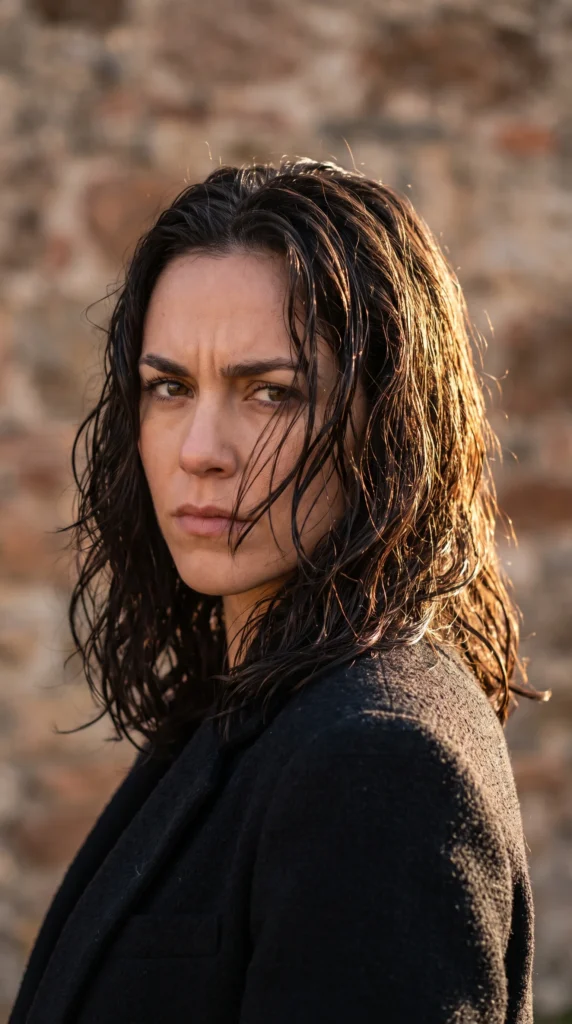
Soft waves with a wet finish give you glam without looking overdone. Apply a lightweight mousse or curl cream to damp hair. Scrunch gently from the ends up. Let your hair air dry, or use a diffuser on low heat. The goal is soft movement, not stiff curls. This look works well for dinner out or a casual party. Budget tip: sea salt spray from the drugstore adds texture without a big price tag. Just don’t overdo it, since too much salt spray can dry out your strands over time. Follow with a hydrating cream to balance things out. This style flatters most face shapes because the waves soften sharp features. If your hair is naturally straight, this is a simple way to add dimension without heat tools. Avoid brushing the waves once they’re set, since brushing can turn soft waves into frizz. Instead, use your fingers to separate strands gently. This look also holds up well in humidity, which makes it a smart pick for warm weather events.
4. Sleek Wet Ponytail
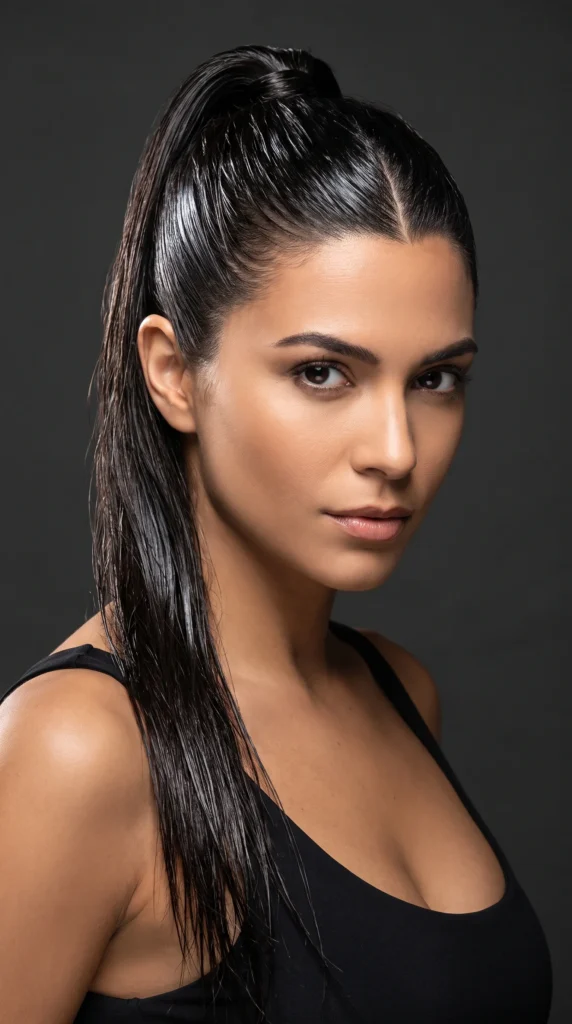
A wet ponytail is one of the fastest ways to look put together. Brush your hair back smoothly, apply a small amount of gel, then secure it high or low with a hair tie. Wrap a small section of hair around the tie to hide it for a cleaner finish. This look is a favorite among red carpet styles because it looks simple but sharp. Budget tip: use a silk scrunchie instead of a plain elastic. It prevents breakage and looks a bit dressier. Keep your part clean and straight for the most polished result. If your hairline has short pieces that won’t stay down, a bit of hairspray on an old toothbrush works well. Avoid pulling the ponytail too tight near your temples, since this can cause tension over time. This style suits almost any occasion, from work meetings to weekend brunch. It also photographs well, which makes it a smart choice if you’re taking pictures for social media or a special event.
5. Half-Up Wet Look Style
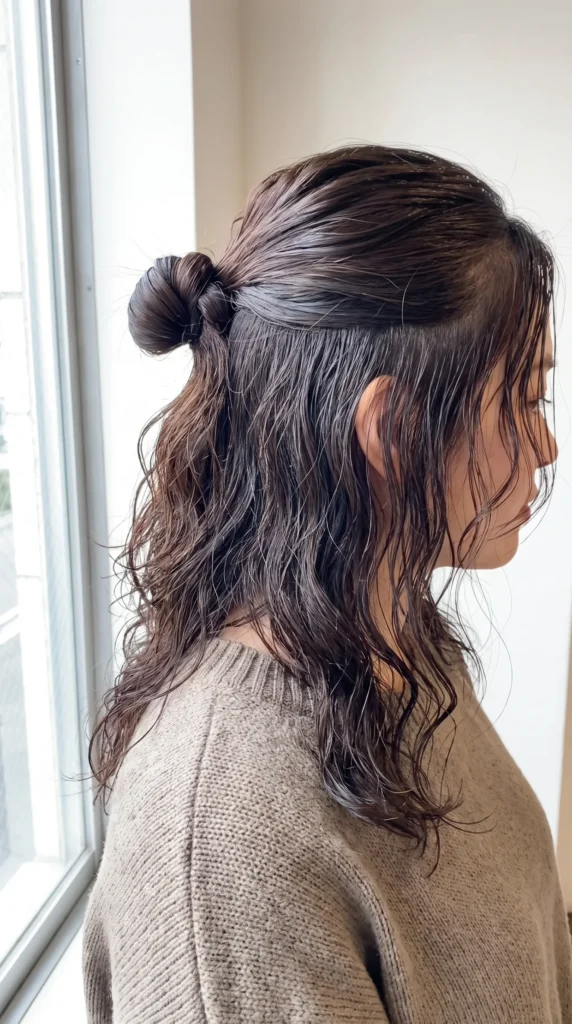
This style gives you the best of both worlds. The top half looks sleek and pulled together, while the bottom half stays loose and wavy. Start by applying gel to your roots and the top section of hair. Pull it back and secure with a small clip or tie. Leave the rest of your hair down, either straight or with soft waves. This look works for everyday wear since it keeps hair out of your face without looking too formal. Budget tip: a simple claw clip does the job just as well as a fancy hair accessory. This style also flatters long hair especially well, since it shows off the length while still looking neat near the crown. If you have bangs, this look lets them stay soft and framed around your face. Avoid using too much product on the bottom half, since you want that part to stay soft and natural looking. This is a low-effort, high-reward style for busy mornings or last-minute plans.
6. Wet Look Braids
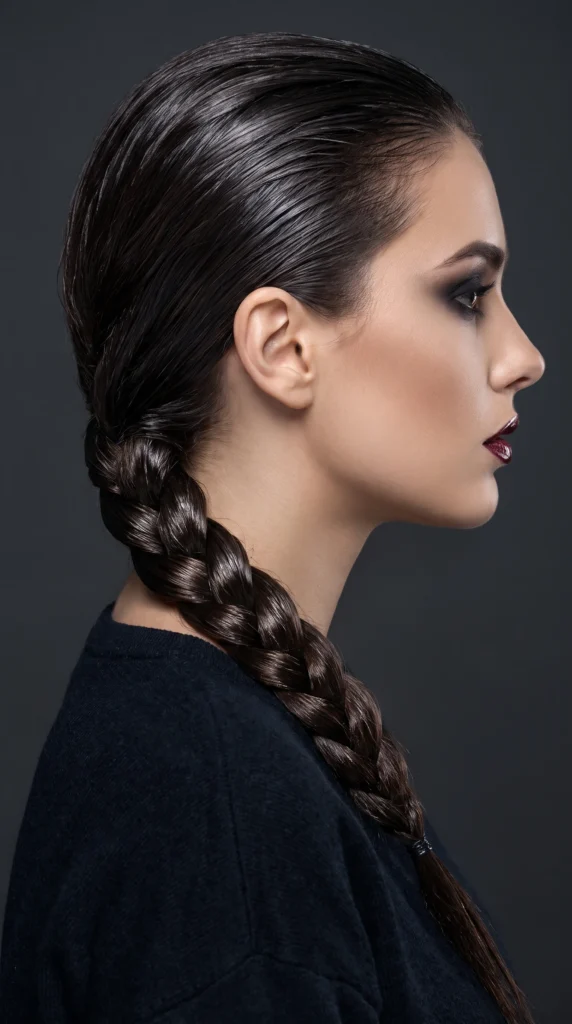
Braids with a wet finish look modern and a little bit edgy. Apply gel to damp hair, then braid it in a classic three-strand style, a fishtail, or a Dutch braid. The wet look keeps the braid smooth instead of fluffy, giving it a sleek, polished shape. This works well for both casual days and dressier events. Budget tip: a small spray bottle filled with water and a drop of leave-in conditioner keeps your hair workable while you braid. This prevents the braid from drying out halfway through styling. If you want extra shine, dab a little hair oil on your palms and smooth it over the finished braid. Avoid braiding too tightly at the scalp, since this can cause discomfort and breakage over time. This style holds up well through a full day of activity, which makes it a smart pick for festivals, beach days, or long shifts at work. It also works nicely on curly hair, since the braid controls frizz while keeping the wet-look shine intact.
7. Beachy Wet Waves
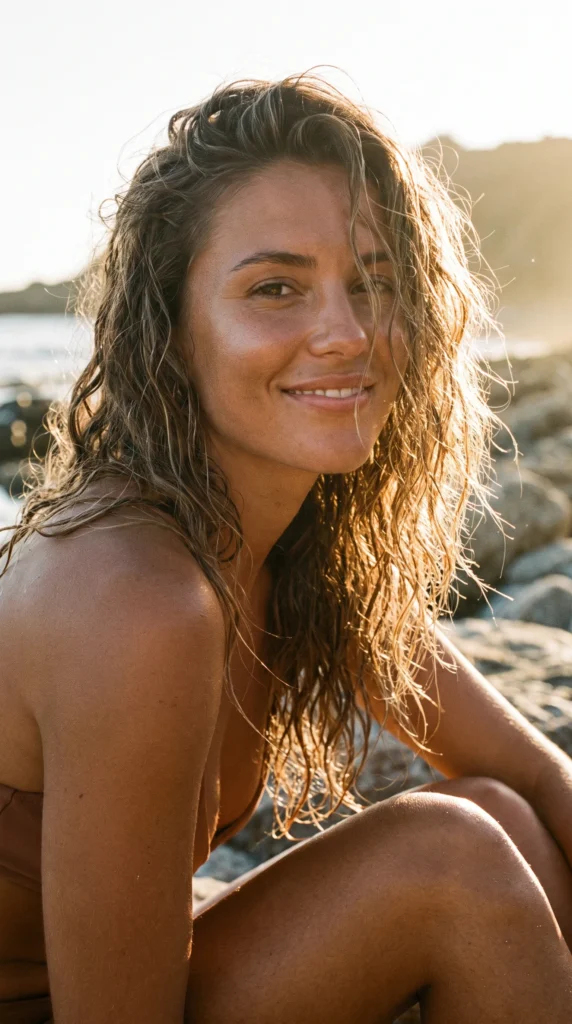
This look mimics that just-came-from-the-ocean feel. Spray sea salt spray onto damp hair, scrunch gently, and let it air dry. The texture should feel a little rough and undone, not sleek. This style pairs naturally with summer outfits and sun-kissed makeup. Budget tip: mix a bit of sea salt with water in a spray bottle at home instead of buying a pricier salt spray. It works nearly as well for a fraction of the cost. Avoid over-salting your hair, since too much can leave it feeling dry and brittle. Follow up with a light oil on the ends to bring back softness. This look works for almost any hair length, though it looks especially good on shoulder-length or longer hair. It’s a low-maintenance style, so it holds up well through a full day outdoors. If you have naturally wavy hair, this style takes only a few minutes since you’re mostly enhancing what’s already there rather than creating waves from scratch.
8. Wet Look Pixie Cut
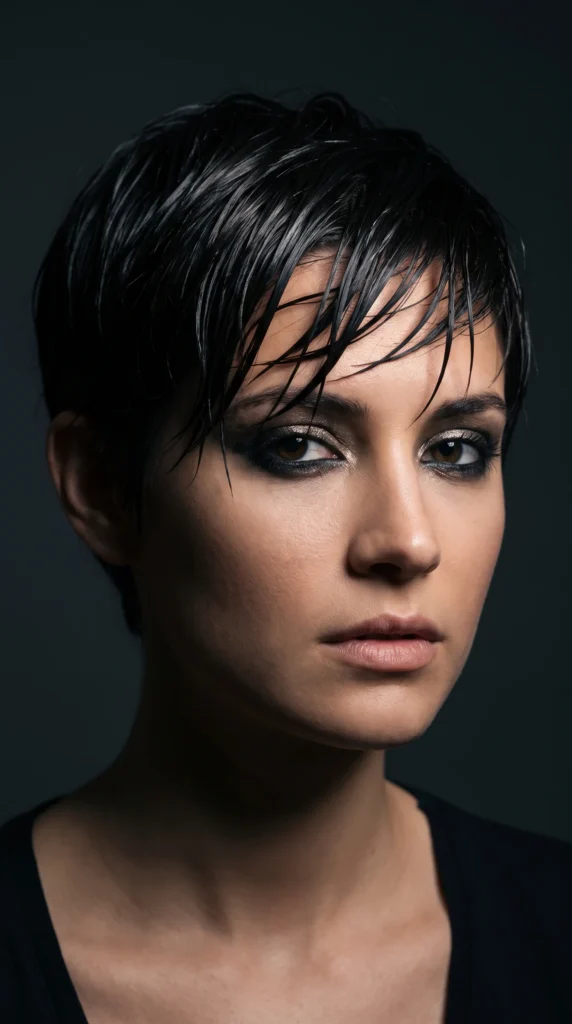
Short hair can rock the wet look just as easily as long hair. On a pixie cut, apply a small dab of gel or pomade to damp hair and use your fingers to push the strands in the direction you want. A side sweep or textured spike both look sharp with a glossy finish. This style is fast, often taking less than two minutes. Budget tip: a pea-sized amount of pomade goes a long way on short hair, so a small jar can last for months. Avoid using too much product, since short hair shows heaviness quickly. If your ends start feeling stiff, rub a drop of oil between your palms and smooth it over the top layer. This look works well for both casual and dressy occasions, since a pixie is easy to shift from playful to polished. It’s also a great option if you’re low on time in the morning, since the wet look on short hair usually sets fast and stays put through the day.
9. Wet Look Bob
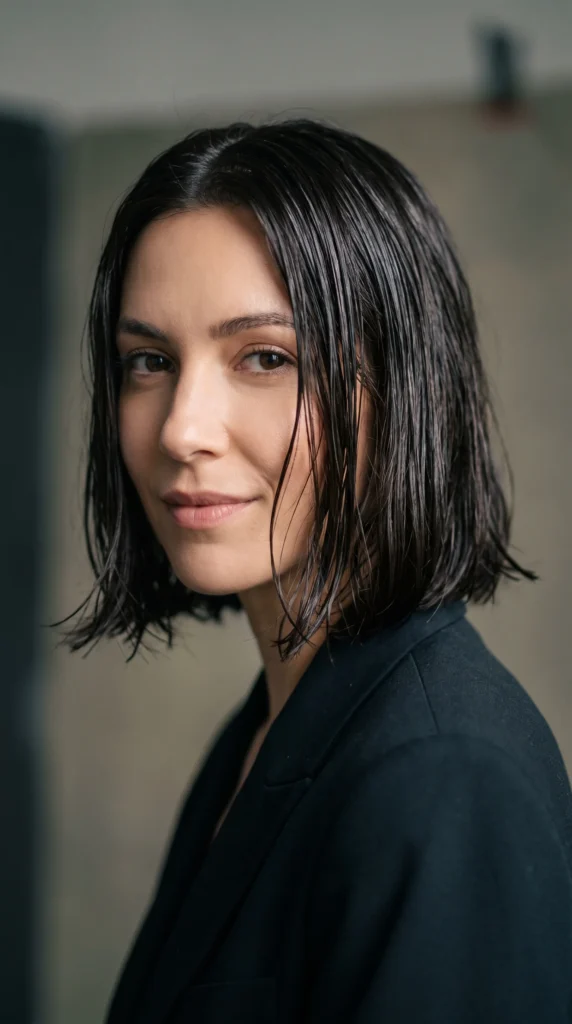
A bob with a wet finish looks clean and modern. Apply a lightweight gel to damp hair and comb it close to your head, or leave a bit of texture near the ends for movement. A middle part or deep side part both work well with this length. Budget tip: a wide-tooth comb, which usually costs very little, gives a smoother finish than a brush on bob-length hair. Avoid brushing after the gel has dried, since this can create frizz instead of shine. This style suits fine hair especially well since the wet look adds body without extra volume products. It also works for thicker hair, since the weight of a bob helps keep flyaways down. This is a quick style for work mornings, and it photographs nicely for video calls or headshots. If your ends start to curl outward as they dry, a small flat iron pass on cool settings can smooth them back into place without extra heat damage.
10. Wet Look Lob
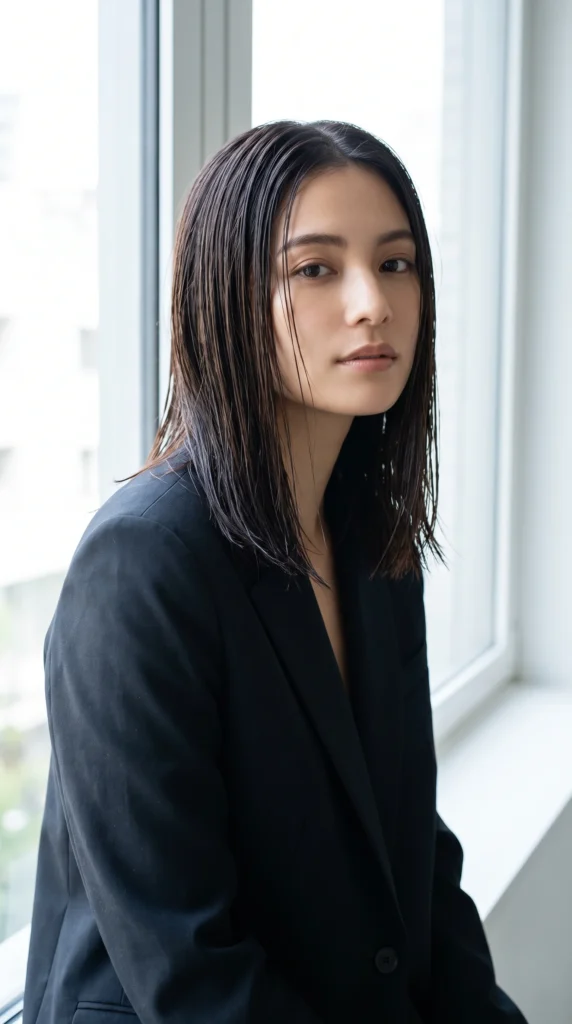
The lob, or long bob, is one of the easiest lengths to style with a wet look. Apply gel evenly through damp hair and comb it straight down, or tuck one side behind your ear for a side-swept effect. This length holds shape well since it’s long enough to lay flat but short enough to avoid looking weighed down. Budget tip: a hydrating leave-in spray, often under a few dollars, can double as your wet-look base if you don’t want to buy a separate styling gel. Avoid applying too much product near your roots, since a lob can look greasy fast if the scalp area gets overloaded. Focus product from mid-length to the ends instead. This style works for both office days and evening plans, since it easily shifts from simple to sleek and dressy. If your hair tends to frizz, finish with a light hairspray to keep everything smooth for the day. This is one of the more low-maintenance wet looks on this list.
11. Deep Side Part Wet Style
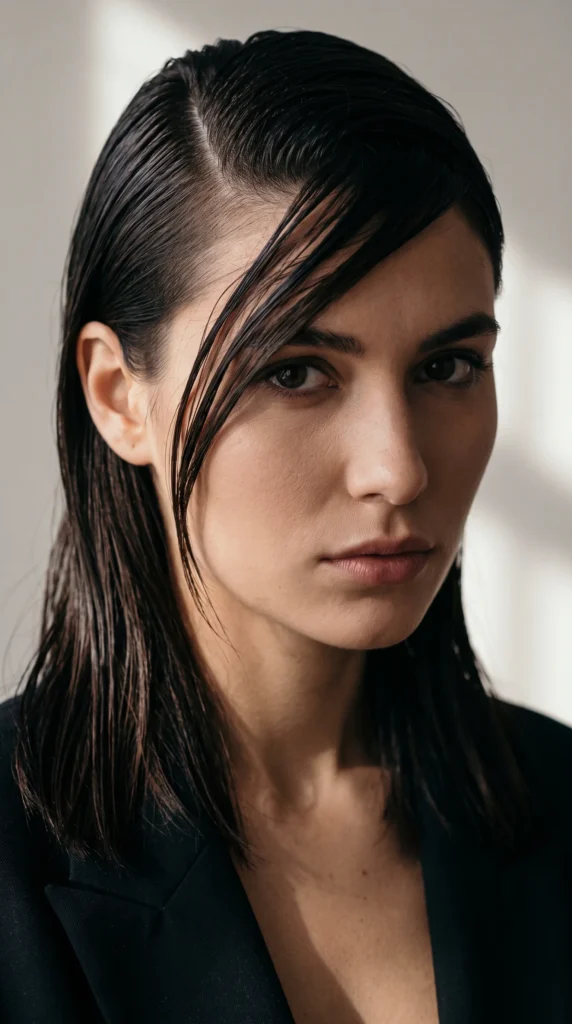
A deep side part instantly changes the mood of any wet hairstyle. Instead of parting your hair in the middle, shift the part closer to one side, near your temple. Apply gel and smooth the longer side across your forehead slightly, letting it fall naturally. This creates a dramatic, high-fashion feel. Budget tip: use a rat-tail comb, which is inexpensive, to create a clean, straight parting line before adding product. Avoid rushing this step, since a crooked part can throw off the whole look. This style pairs well with slicked-back sides or loose waves on the longer side for contrast. It works on most hair lengths, though it looks especially striking on long or lob-length hair. This is a strong choice for photos, since the deep part adds an editorial feel without much added effort. If your part keeps shifting back to its natural line, a small clip near the root can hold it in place while the gel sets.
12. Middle Part Wet Slick
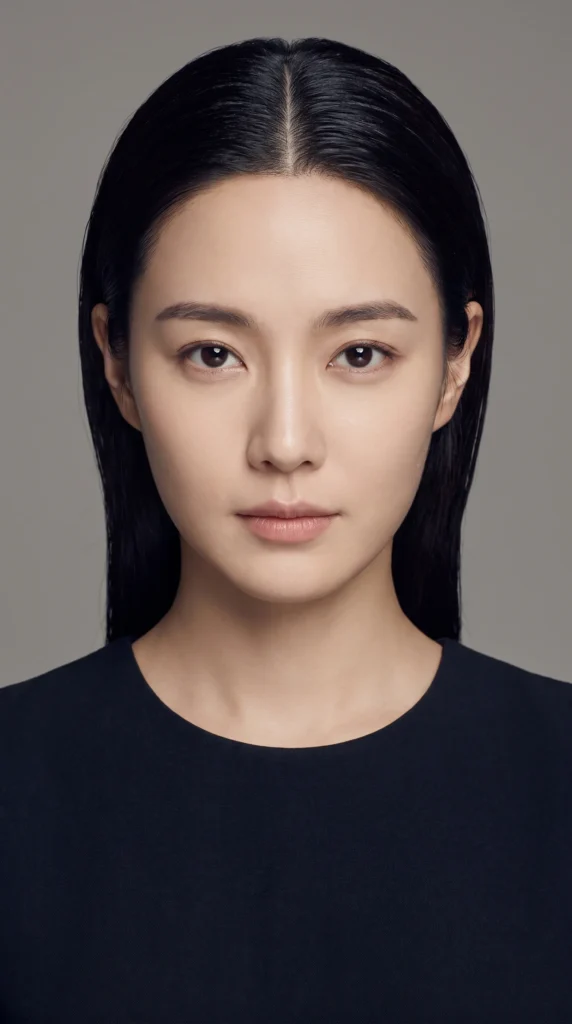
A middle part gives wet hair a clean, symmetrical look. Comb your hair straight down the center, then apply gel evenly on both sides. Smooth it back or let it fall straight for a sleek, minimal finish. Budget tip: a fine-tooth comb works well for keeping the part line thin and precise, and most drugstores carry one for very little money. Avoid uneven product application, since one side looking wetter than the other will throw off the balance. This style flatters oval and heart-shaped faces especially well, since it keeps focus on the center of the face. It also works nicely with minimal makeup, since the hairstyle itself carries the look. This is a solid choice for a first date, a work presentation, or a simple everyday refresh. If your hair tends to separate unevenly at the part, a small dab of gel directly on the scalp line helps keep things smooth throughout the day without looking greasy.
13. Wet Look Curly Hair

Curly hair and the wet look are a natural match. Apply a curl cream or gel to soaking wet hair, then scrunch upward from the ends to the roots. This helps define each curl instead of leaving it flat or frizzy. Let your hair air dry, or use a diffuser on low heat for faster results. Budget tip: a leave-in conditioner mixed with a bit of gel, sometimes called a “cocktail” method, gives moisture and hold without buying two separate products. Avoid touching your curls while they’re drying, since this is the biggest cause of frizz. Once fully dry, you can scrunch out the crunch with your fingers for a softer, glossier finish. This style works on all curl patterns, from loose waves to tight coils. It holds up well in humid weather, which makes it a smart choice for warm climates. This look also saves time, since you’re working with your natural texture instead of fighting against it with heat tools.
14. Mermaidcore Wet Waves

This trend takes the beachy wave idea and adds extra shine for a soft, glossy effect. Apply a hydrating cream or oil to damp hair, then loosely braid it before bed or scrunch it while air drying. The goal is soft, glossy waves rather than crunchy or dry texture. Budget tip: a drugstore argan oil works well for adding shine without a heavy price tag, and a few drops go a long way. Avoid applying oil too close to the roots, since this can make hair look greasy fast. Focus it mid-length to ends instead. This style pairs beautifully with soft, dewy makeup and pastel or jewel-toned outfits. It works especially well on long hair, since the waves have more room to flow. This is a great pick for summer events, beach vacations, or any time you want a dreamy, romantic finish. If your waves fall flat by midday, a small spritz of texture spray brings the shape back without needing to restyle from scratch.
15. Wet Look Wolf Cut
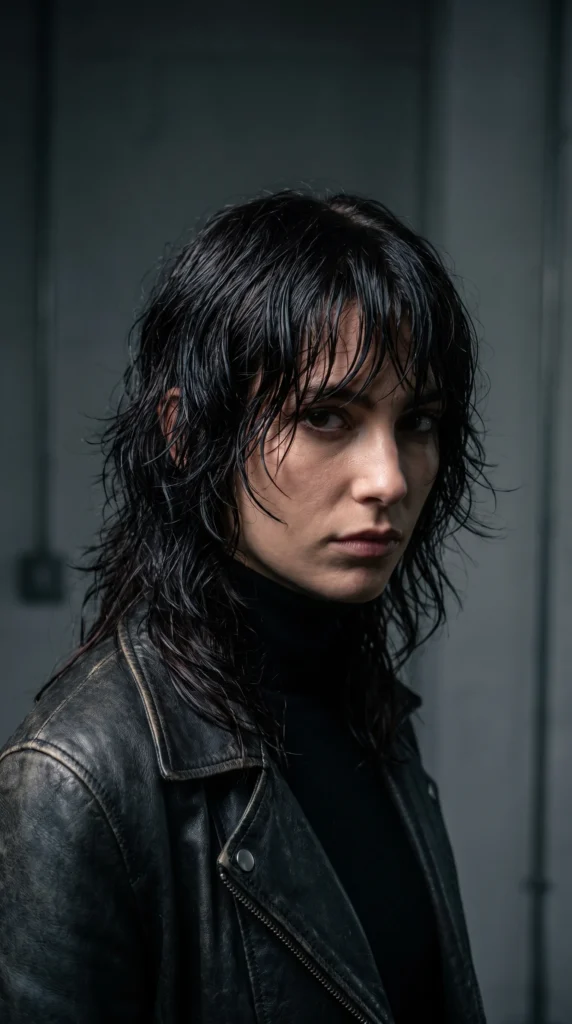
The wolf cut, known for its choppy layers and shaggy shape, looks sharp with a wet finish. Apply a lightweight gel or texture cream to damp hair, then scrunch and twist sections for a piecey, undone look. The wet finish keeps the layers defined instead of looking messy. Budget tip: a texturizing spray, often priced low at the drugstore, helps separate layers without needing a heavier styling cream. Avoid applying too much product evenly, since this cut looks best with some pieces heavier and others lighter for contrast. This style works well for those who want an edgy, low-effort look that still feels styled. It suits medium to long hair with layers built in. This is a strong pick for concerts, casual outings, or anytime you want your hair to have a bit of attitude. If you want more shine and less texture, swap the texture spray for a smoothing oil instead, and scrunch gently rather than twisting.
16. Red Carpet Wet Hair
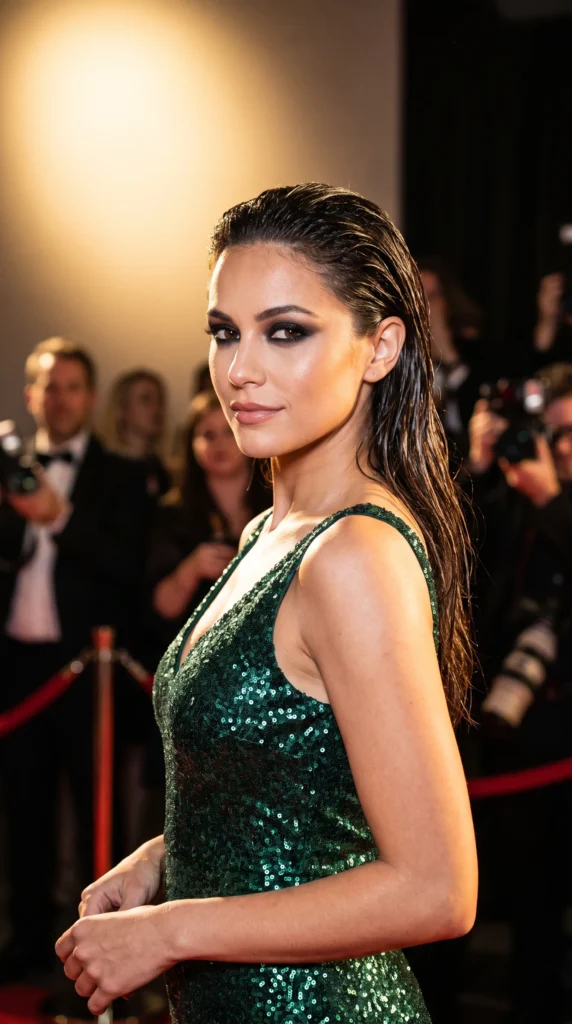
This is the glam version of the wet look, made for big occasions. Slick your hair back completely, or create a sleek low bun with a deep side part. Add extra shine with a hair oil or serum for that glossy, camera-ready finish. Budget tip: a small amount of coconut oil, warmed between your palms, gives a similar glossy effect to pricier styling serums. Avoid oil near your roots, since this can flatten volume too much for an event look. This style pairs well with statement earrings and bold makeup, letting the hair act as a clean backdrop. It works for weddings, galas, or any dressy night out. If you want a softer version, leave a few face-framing pieces loose instead of slicking everything back. This look photographs beautifully thanks to the light-catching shine, which makes it a smart choice if you know you’ll be taking a lot of pictures. Set the whole style with a light hairspray so it holds through hours of dancing or mingling.
17. Wet Look Low Bun
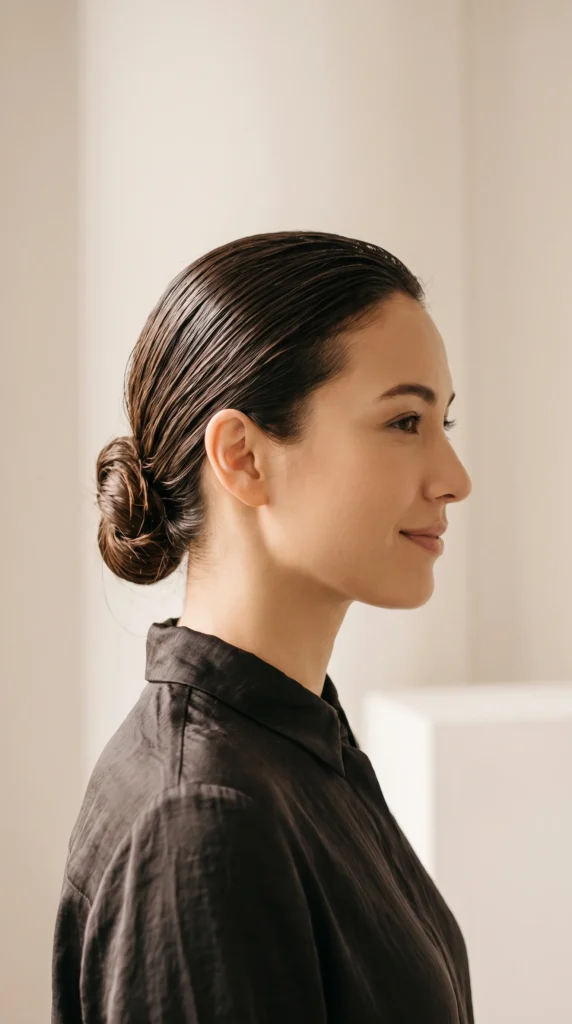
A low bun with a wet finish feels refined and effortless at the same time. Comb your hair back smoothly, gather it at the nape of your neck, and twist it into a bun. Secure with pins and smooth any flyaways with a bit of gel on your fingertips. Budget tip: hair pins from a dollar store work just as well as pricier salon versions, so there’s no need to overspend here. Avoid making the bun too tight, since a slightly relaxed shape looks more natural and comfortable for long wear. This style suits both fine and thick hair, since the low placement keeps things balanced. It’s a strong choice for the office, since it looks neat without appearing too formal. This look also works well under hats or headbands, so it’s a flexible option depending on your outfit. If your bun feels loose by the afternoon, a few extra pins near the base usually solve the problem quickly.
18. Wet Look High Ponytail
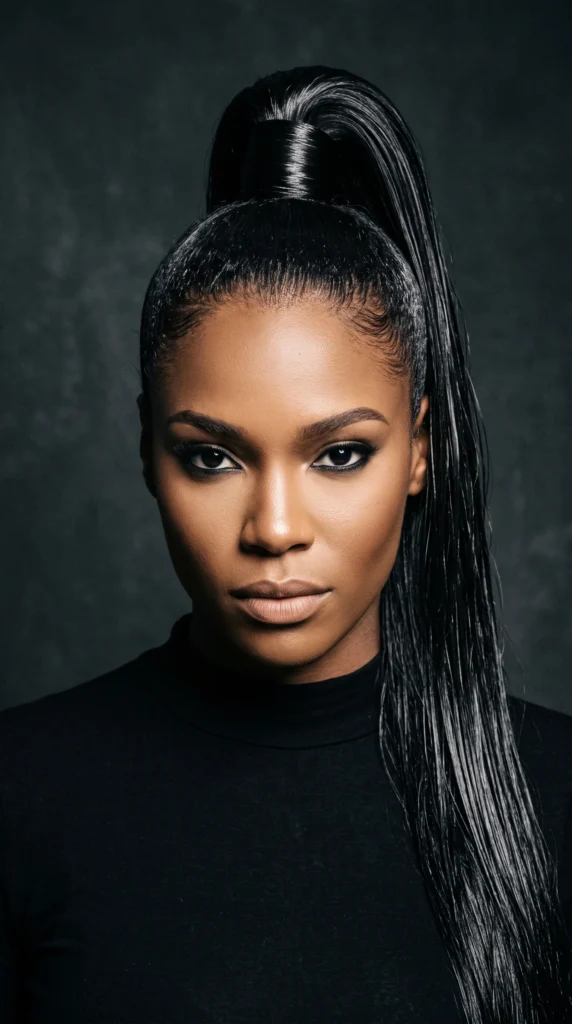
A high ponytail with a wet finish adds instant energy to any look. Brush your hair up smoothly, apply gel to control flyaways, and secure it high on your head. Wrap a small piece of hair around the base for a clean finish. Budget tip: an inexpensive elastic hair tie without metal parts helps prevent breakage, and a pack usually costs very little. Avoid pulling the ponytail so tight that it causes tension headaches, especially if you’ll be wearing it for hours. This style works well for workouts, casual days, or dressed-up looks when paired with bold jewelry. It suits most face shapes, since the height helps lift the whole face. This is also a practical choice for hot weather, since it keeps hair off your neck while still looking styled. If you want extra polish, smooth a bit of oil over the ponytail itself after securing it, giving the length a glossy, finished look from root to tip.
19. Wet Look for Fine Hair

Fine hair can look thin if too much product gets added, so the trick is balance. Use a lightweight, water-based gel instead of a heavy cream. Apply a small amount, focusing mostly on the surface layer rather than saturating every strand. Budget tip: a spray-on volumizer, often cheap at the drugstore, adds a bit of lift before you apply your wet-look product, keeping hair from looking flat. Avoid oil-heavy products, since these can weigh fine hair down fast. A slicked-back style or a simple low ponytail both work well for this hair type, since they don’t require heavy layering of product. This style holds up better with a light hairspray rather than a thick gel, since spray tends to add shine without extra weight. If your hair feels limp by midday, a small refresh with dry shampoo at the roots before reapplying your wet-look finish can bring it back to life without needing a full rewash.
20. Wet Look for Thick Hair
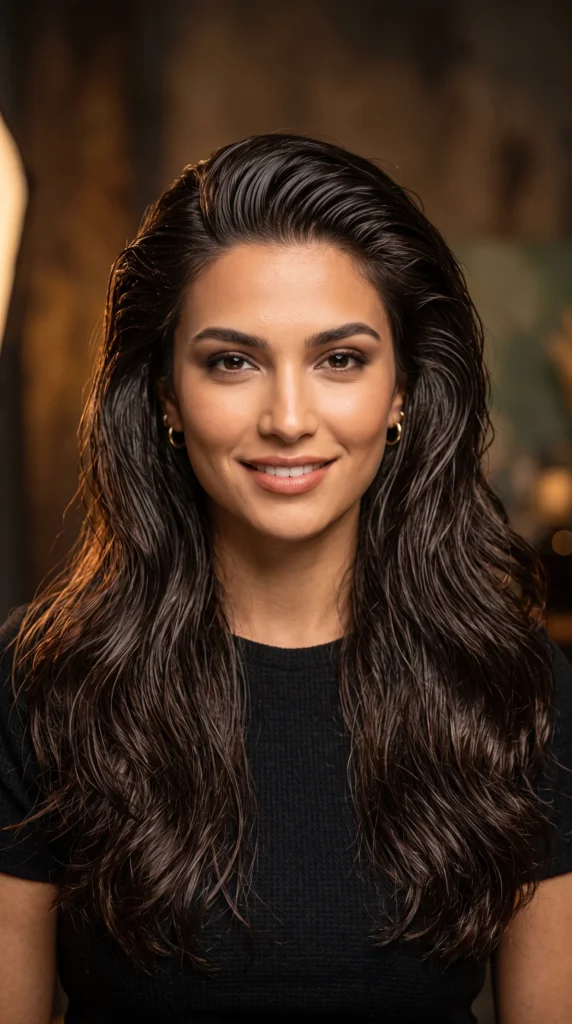
Thick hair holds a wet look beautifully, but it often needs a bit more product to fully control. Apply gel or cream generously through damp hair, working from roots to ends in sections. Use a wide-tooth comb first to detangle before smoothing everything into place. Budget tip: a large, inexpensive bottle of styling gel goes further on thick hair than smaller, pricier options, so buying in bulk can save money over time. Avoid applying product only on the surface, since underlayers can dry frizzy if skipped. A slicked-back ponytail, a low bun, or defined waves all work well for this hair type. This style holds shape for a long time thanks to the natural weight of thick hair. If your hair takes a long time to dry, applying the product while your hair is only slightly damp, rather than soaking wet, can cut down drying time significantly while still giving you that smooth, glossy finish.
21. Wet Look Wedding Hairstyle
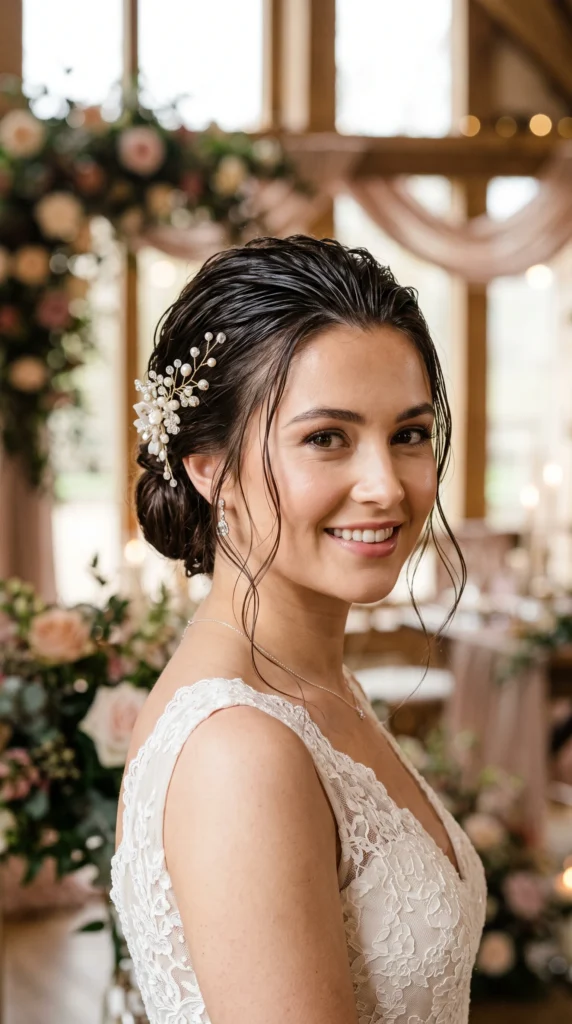
Weddings call for a softer version of the wet look, one that feels elegant rather than edgy. A smooth low bun or half-up style with soft, face-framing pieces works beautifully. Apply gel or a smoothing cream lightly, keeping the finish glossy but not overly slicked. Budget tip: a pearl or simple hairpin from an affordable accessory shop can add a bridal touch without a big spend. Avoid using too much shine product if you’re being photographed with flash, since heavy oil can create unwanted glare in pictures. This style pairs well with a veil or floral accessory, and it holds up through hours of celebration when set with a light-hold hairspray. It works for brides, bridesmaids, or wedding guests alike. If your hair tends to frizz in humidity, a smoothing serum applied before the style helps keep everything polished from the ceremony through the reception, so you won’t need many touch-ups during the day.
22. Wet Look Party Hair
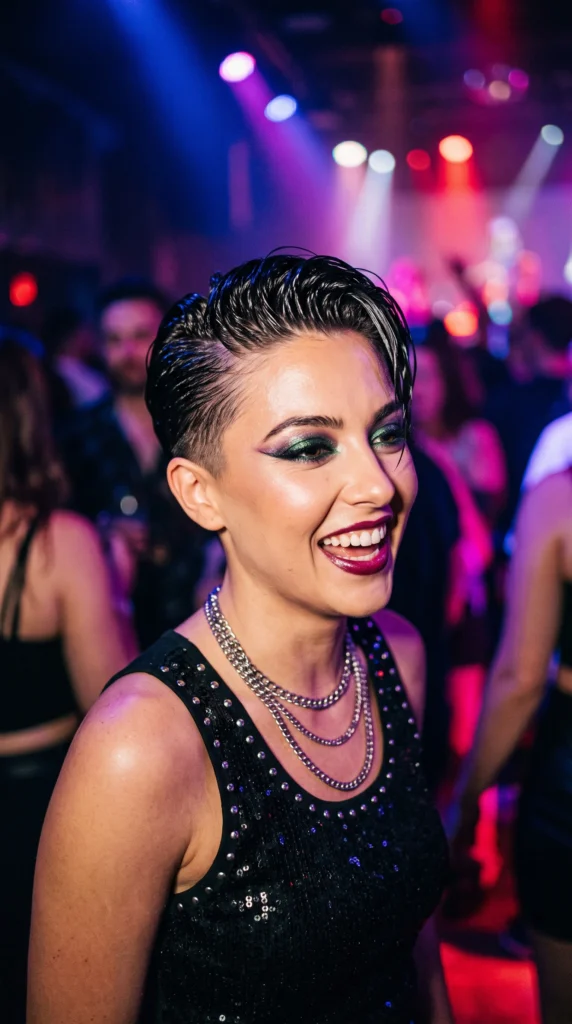
Party nights call for a wet look with a bit more attitude. Slick your hair back fully, or add a deep side part with extra shine for a bold, dramatic effect. Use a stronger-hold gel so the style survives dancing and movement. Budget tip: a small travel-size hairspray in your bag lets you touch up flyaways throughout the night without needing to carry a full-size bottle. Avoid using so much gel that your hair feels hard or crunchy, since a flexible hold looks more natural under club or party lighting. This style pairs well with bold eyeliner or metallic makeup for a full glam effect. It works for birthdays, girls’ night out, or any event where you want your hair to feel a little louder than usual. If you want a softer party look, try wet waves instead of a full slick back, giving movement to the style while still keeping that glossy, wet-look shine throughout the night.
23. Wet Look for Everyday Wear

Not every wet look needs to be dramatic. For daily wear, keep things simple with a light gel or leave-in cream applied to damp hair, then let it air dry naturally. This works well for running errands, heading to work, or casual meetups. Budget tip: a multi-purpose leave-in spray, usually priced low, can double as a detangler, moisture boost, and light wet-look finisher all in one product. Avoid overthinking this style, since the goal is a fresh, low-effort finish rather than a full glam look. A simple half-up clip or loose waves both work well here. This style saves time in the morning, since there’s no need for heat tools or long styling sessions. It also protects your hair from daily heat damage, which can help with length retention over time. If you want a small upgrade for the day, add one sleek piece near your face or a subtle side part for a slightly more polished touch.
24. Wet Look Summer Pool Style
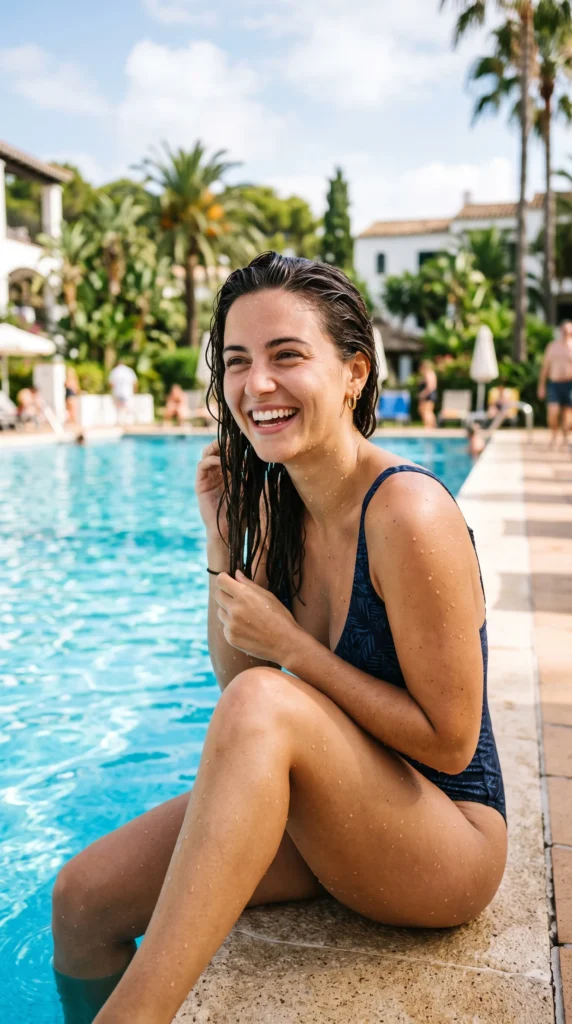
Pool days already give you naturally wet hair, so use it. After swimming, apply a leave-in conditioner to protect against chlorine or salt water, then let your hair air dry into natural waves. A simple slick-back or low bun also works well straight out of the water. Budget tip: a small travel bottle of leave-in conditioner, often just a few dollars, helps protect your hair from sun and water damage all summer long. Avoid skipping this step, since chlorine and salt water can dry hair out fast if left untreated. This style requires almost no extra effort, since you’re working with hair that’s already wet. It’s a smart choice for beach days, pool parties, or any outdoor summer event. If your hair starts to feel stiff from salt or chlorine, rinse with fresh water and apply a small amount of oil to bring softness and shine back before your hair fully dries.
25. Wet Look with Braided Accents
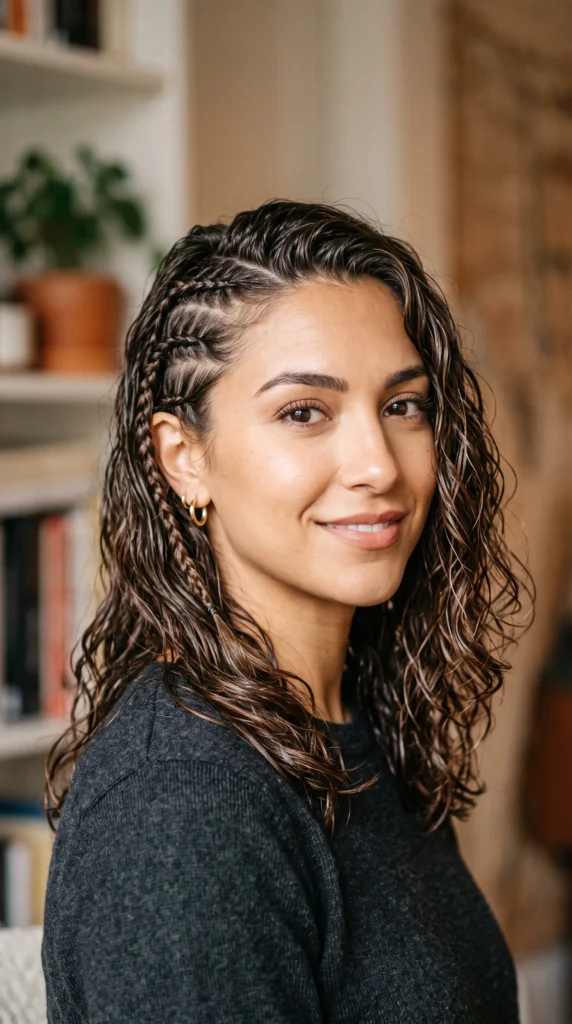
Small braids mixed into a wet-look style add a bit of detail without much added time. Apply gel or cream to damp hair, then create one or two thin braids near your temple or crown before letting the rest of your hair air dry into waves. Budget tip: embroidery thread or thin hair elastics, both very affordable, can be woven into the braid for a small decorative touch. Avoid making the braids too tight, since a looser weave blends better with the soft, wavy background. This style works well for festivals, casual parties, or anytime you want a bit of extra detail in your hairstyle. It suits most hair lengths, though it looks especially nice on medium to long hair where the braid has room to stand out. If you want to switch things up, try adding two small braids on either side instead of one, framing your face symmetrically while keeping the rest of the wet-look wave flowing naturally.
Conclusion
Wet hair looks give you a lot of style for very little effort. From a simple slicked-back ponytail to soft mermaid waves or a sleek bridal bun, there’s a version of this trend for every hair type, length, and occasion. Keep your product amounts light, focus on damp rather than soaking hair, and choose budget-friendly options like drugstore gel, leave-in conditioner, and affordable hair ties to keep the whole routine simple and affordable. Pick two or three looks from this list to try first, and build from there as you get comfortable with what works best for your hair.